![How to Make Preview Default for PDF [Best Guide for You]](/images/pdf-editor/en/related-articles/4.jpg)


- About
- Discover EaseUS
- Reviews & Awards
- License Agreement
- Privacy Policy
- Student Discount
How to Flatten PDF? 3 Practical Ways
Melissa Lee updated on Jun 16, 2026 | Home > PDF Knowledge Center | min read
- What does it mean to flatten a PDF?
- Flattening a PDF means making a PDF read-only or locking the entire document uneditable. The process will combine all contents in the PDF file, including Forms, images, text files, etc., all layers into one.
In an unflattened PDF, various layers are editable and can be modified. Confidential or vital PDF files, such as contracts and HR documents, can be easily modified and revised if they are not flattened. This could cause security, compatibility, file size, or printing issues.
To make some vital PDF files uneditable in a read-only mode, you'll need to flatten a PDF file with reliable methods.
How to Flatten a PDF? 3 Reliable Methods Covered
So, is there dedicated PDF editing software that you can apply to flatten a PDF? Sure. In this part, you'll find 3 reliable ways that work efficiently to help you flatten a PDF file in a minute. The 3 ways are Adobe Acrobat Pro, Adobe Acrobat Shortcut, and Adobe Acrobat alternative.
If you are a beginner and looking for a reliable PDF editor to flatten your PDF files, click the button and follow the guide to get started.
| 3 Ways to Flatten a PDF | Why Choose It |
|---|---|
| Way 1. Flatten PDF in Adobe Acrobat Pro | Professional tool, cross-platform... More details>> |
| Way 2. Flatten PDF with Adobe Acrobat Shortcut | Quick to access, cross-platform... More details>> |
| Way 3. Flatten a PDF with Adobe Alternative - Easier | Free, easy-to-use...More details>> |
🔖Note: There are two ways to find the PDF flattening feature in Adobe, including using the editing tool (Print Production) and the shortcut keyboard (Ctrl+P). Each method is useful for you to adjust the layouts and other options on a PDF. If you are looking for a free way, take Adoble Alternative in Way 3 for help.
Don't forget to share the above-provided methods online to help more PDF users flatten their files and secure their copyrights and benefits.

Way 1. Flatten PDF in Adobe Acrobat Pro via Print Production
Adobe Acrobat Pro has a Print Production feature that helps you simply flatten the PDF files. It's beneficial if you need to print a flattened PDF as you lock the fillable items. Also, if you are using an editor to import a PDF, elements like forms can still be editable. One way to prevent it from being editable is by flattening a PDF.
Before getting started:
|
Flattening a PDF in Adobe Acrobat Pro DC on Windows 10:
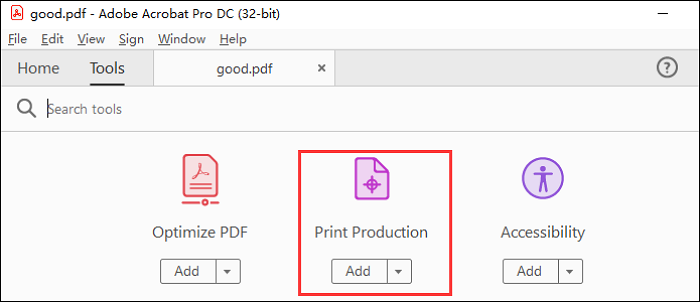
Step 1. Open this tool and import your file by clicking "File" > "Open". Back to the Tools, and you scroll down the menu and look for one feature named "Print Production". Click it and then you will see a new window.
Step 2. Now, you see the option "Flattener Preview" on the right side of the toolbar. Select this option, and it shows the Flattener Preview window. To print your PDF pages better, you should apply those options in the flattener.
It gives the options as follows:
- Transparency flattener from low to high resolution, and the Raster/Vector Balance
- Flatten and adjust the transparency for a PDF page about the color space
- Flattener-generated images of the compression option

Step 3. Once you have finished the settings, remember to enable the number of pages in a PDF. From the left side of the window, choose one selection from all pages, current pages, or manually select the range.
Use the following buttons to share the guides on how to flatten a PDF in Adobe Acrobat.
Way 2. Flattening a PDF File with Adobe Acrobat Shortcut
Alongside a manual way, Adobe Acrobat also offers you a print shortcut to flatten a PDF file by using the Ctrl + P keys. It brings similar effects to the previous method. The transparency flattener preset is also involved. You are allowed to apply many custom settings when flattening a PDF.
Before getting started:
|
Below is a guide for you to turn a fillable PDF into a read-only version.
How to flatten a PDF in Adobe with Print Shortcut:
Step 1. Go to "File" > "Open" to import your target PDF in Adobe. Then, in the viewing PDF, you use "Ctrl + P" to open the printer.
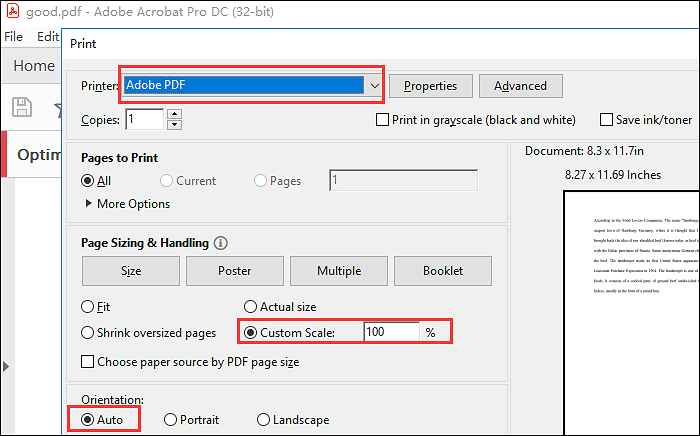
Step 2. In the new window, select the Custom Scale in Page Sizing & Handling. Meanwhile, enable Auto in the orientation.
Step 3. To apply more advanced settings to flatten a PDF, click "Advanced". Here you see the "Transparency Flattener Preset" option, changing the resolution from high to the low level. After that, hit "OK".
Step 4. To save a flattened PDF on your computer, you find the "Printer" option and click it. Open the drop-down lists and choose "Adobe PDF". Finally, click "Print" to finish it. Then a window "Save PDF File As" shows, and you can rename it and click "OK".
Way 3. Flatten a PDF With Adobe Alternative -Free Method
As Adobe has 7 days for a trial, when the trial period expires, you have to pay to unlock Adobe Acrobat features to flatten PDF. If you are looking for a free PDF Editing Software that can also flatten a PDF, EaseUS PDF Editor is one of the tools you can trust. With it, you can make the entire PDF file uneditable and protect the design.
Also, as a dedicated PDF editor, it can convert, edit, and fill out your PDF pages in a few simple steps. You can download it and try these functions without registration.
EaseUS PDF Editor
- Rotate, crop, or merge a PDF file on a PC
- Print PDF without margins with ease
- Capable of filling out a non-fillable PDF form
- Convert PDF to JPG on Windows 10 with ease
- Make a PDF file editable, searchable, and flattenable
How to flatten a PDF on a Windows PC with Adobe Acrobat free alternative:
Step 1. Launch EaseUS PDF Editor on your Windows PC, and click Open to import the PDF which you want to make it become inactive.
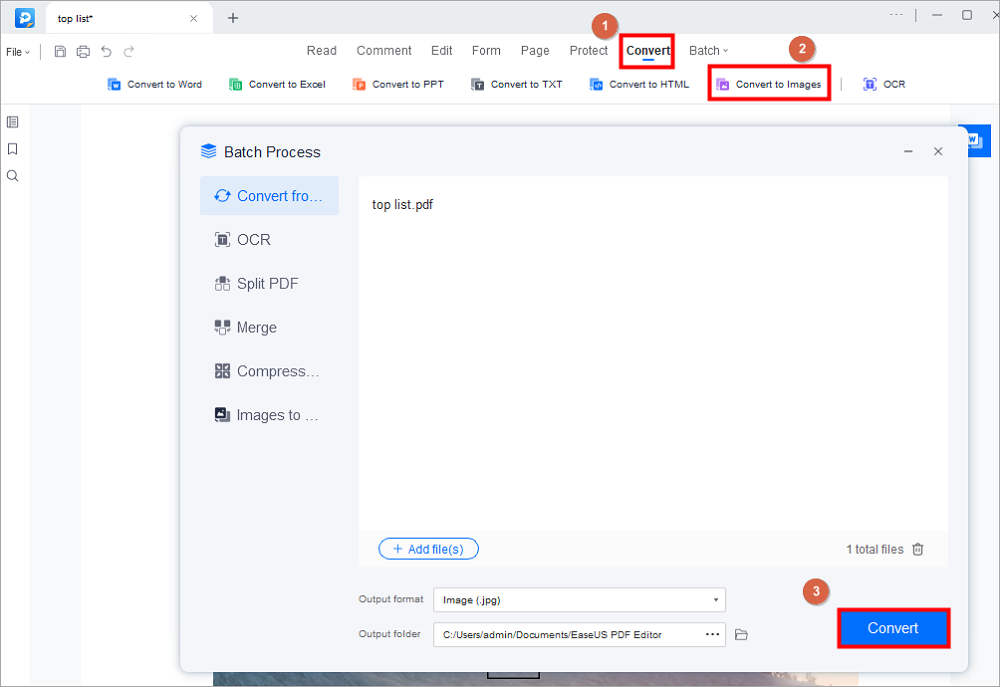
Step 2. Click Convert > Convert to Images to convert your PDF pages into images. Once done, the converted images will be saved to your computer.
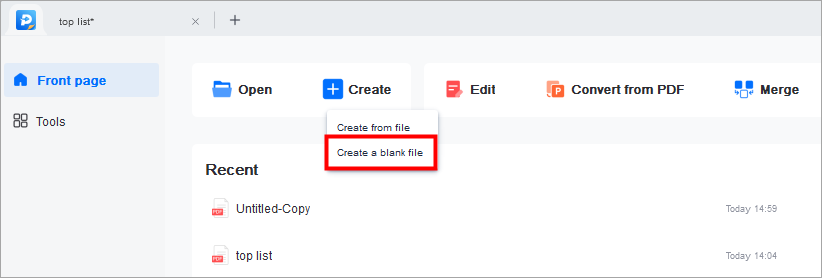
Step 3. Go back to the main interface of EaseUS PDF Editor again, and click Create > Create a blank file.
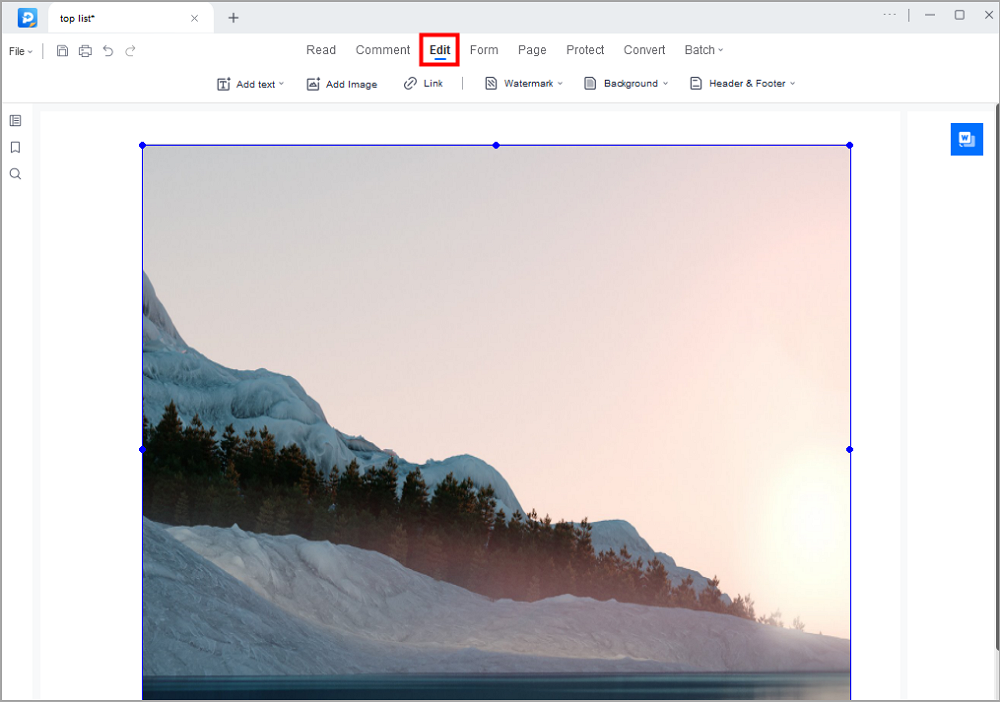
Step 4. In the Edit mode, choose the Add Image option. Now, you need to insert all the pictures converted from the original PDF. Don't forget to ensure that those pictures are in the correct order.
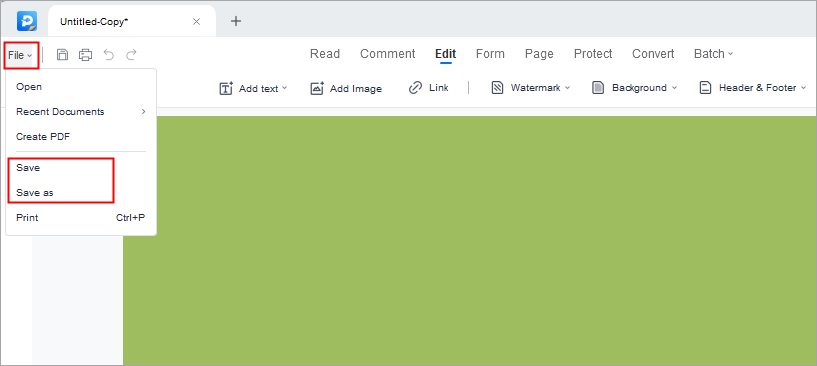
Step 5. Finally, click on File > Save or Save As to obtain the inactive PDF.
Why Do You Need a Flattened PDF?
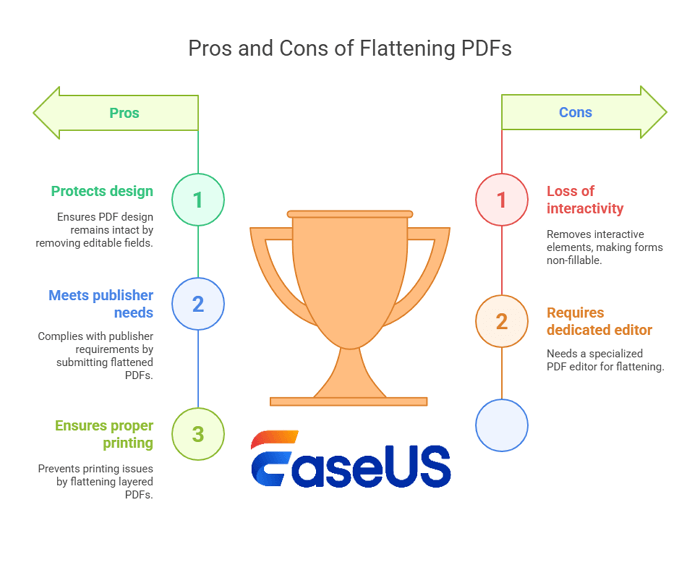
Interactive properties like forms will not be fillable in a read-only PDF. That's why you require a flattened PDF. There could be some practical reasons for operating it.
✔️Firstly, it can protect the design and forms in a PDF. If you have a PDF form with editable fields, you need to remove fillable fields in PDF to flatten it to secure the data.
✔️In order to meet the requirements of some publishers, you need to upload a PDF file after flattening it.
✔️Last but not least, for printing, if your PDF has many layers, it may not print as you desire, so you need to flatten it. Therefore, to make it, you need a dedicated PDF editor.
Conclusion
On this page, we provided you 3 ways to flatten a PDF file, making your confidential PDF document uneditable in a few simple clicks with respective tutorial guide as shown above.
Among the PDF flattening methods, Adobe Acrobat is a professional and full-featured PDF editing tool. It provides highly customizable flattening options, such as transparency flattening settings and page range selection, suitable for users with high requirements for output quality and document security.
However, its interface is more complex. In contrast, EaseUS and other tools, such as the interface, are simpler, more convenient to operate, and suitable for general users to quickly fulfill their needs. Choose a suitable tool according to your needs.
FAQs About Adobe Acrobat Flatten PDF
1. What does flattening a PDF mean?
Flattening a PDF merges all interactive elements, layers, and annotations into a single, non-editable layer, creating a static document that preserves appearance and prevents further editing or changes.
2. Is flattening a PDF the same as compressing?
No, flattening a PDF merges all layers and interactive elements into a single, non-editable layer, while compressing reduces the file size by optimizing images and data. Flattening focuses on locking content; compression focuses on making the file smaller.
3. Can I use Adobe Acrobat to flatten a PDF?
Yes. Follow the path to flatten a PDF in Adobe Acrobat: Advanced > Print Production > Flattener Preview. where you can adjust settings like raster/vector balance and convert interactive elements into a single static layer. After applying these settings, the PDF becomes flattened.
About the Author
Melissa Lee is a sophisticated editor for EaseUS in tech blog writing. She is proficient in writing articles related to screen recording, voice changing, and PDF file editing. She also wrote blogs about data recovery, disk partitioning, and data backup, etc.