- About
- Discover EaseUS
- Reviews & Awards
- License Agreement
- Privacy Policy
- Student Discount
PDF Editor
Welcome
Activation
Navigate a PDF
Create a PDF
Convert PDF
Edit a PDF
Pages
OCR
Add Protection
Sign a Document
Comment PDF
Forms
Feedback and Support
Welcome
EaseUS PDF Editor is a versatile software that allows you to edit, convert, create, and view PDF documents. It also offers additional features such as page management, document protection, digital signing, form preparation, and many others. To get a better understanding of how this PDF editor works, refer to the guide below.
Activation
We offer both trial and paid versions of EaseUS PDF Editor. The trial version allows for the conversion of a maximum of 5 pages per file to Word, Excel, or PowerPoint, and the converted file will have the watermark of EaseUS PDF Editor.
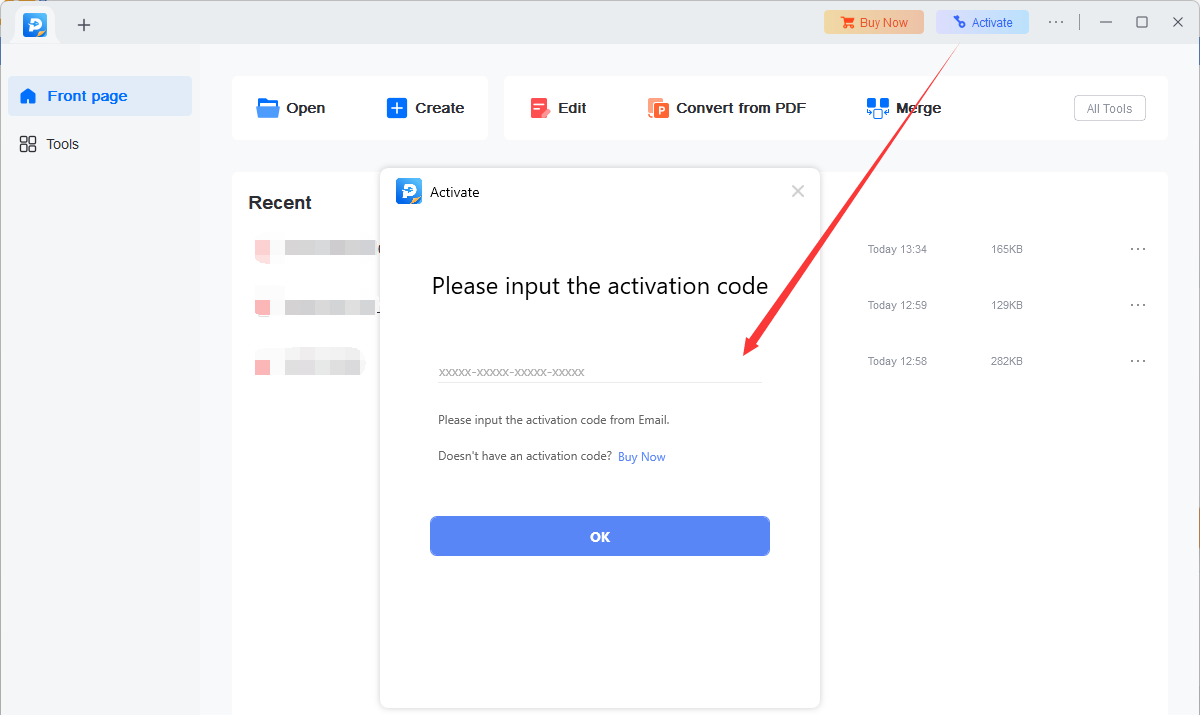
To activate the program, click the Activate button on the top right corner of the main interface of EaseUS PDF Editor, enter your license to in the pop-up Activation Window, then click OK. Once the license code is successfully applied, the trial version will be upgraded to the paid version.
Note:
It is highly recommended to directly copy and paste (using Ctrl+C and Ctrl+V) the license code into the activation box. This helps to prevent any potential typing errors when manually entering the code.
Offline activation is not supported. Make sure your computer is connected to the internet during the activation process.
Navigate a PDF
EaseUS PDF Editor offers various page view modes, making it effortless to view any PDF files on your computer. You can set it as your default PDF reader for seamless usage.
Open PDF
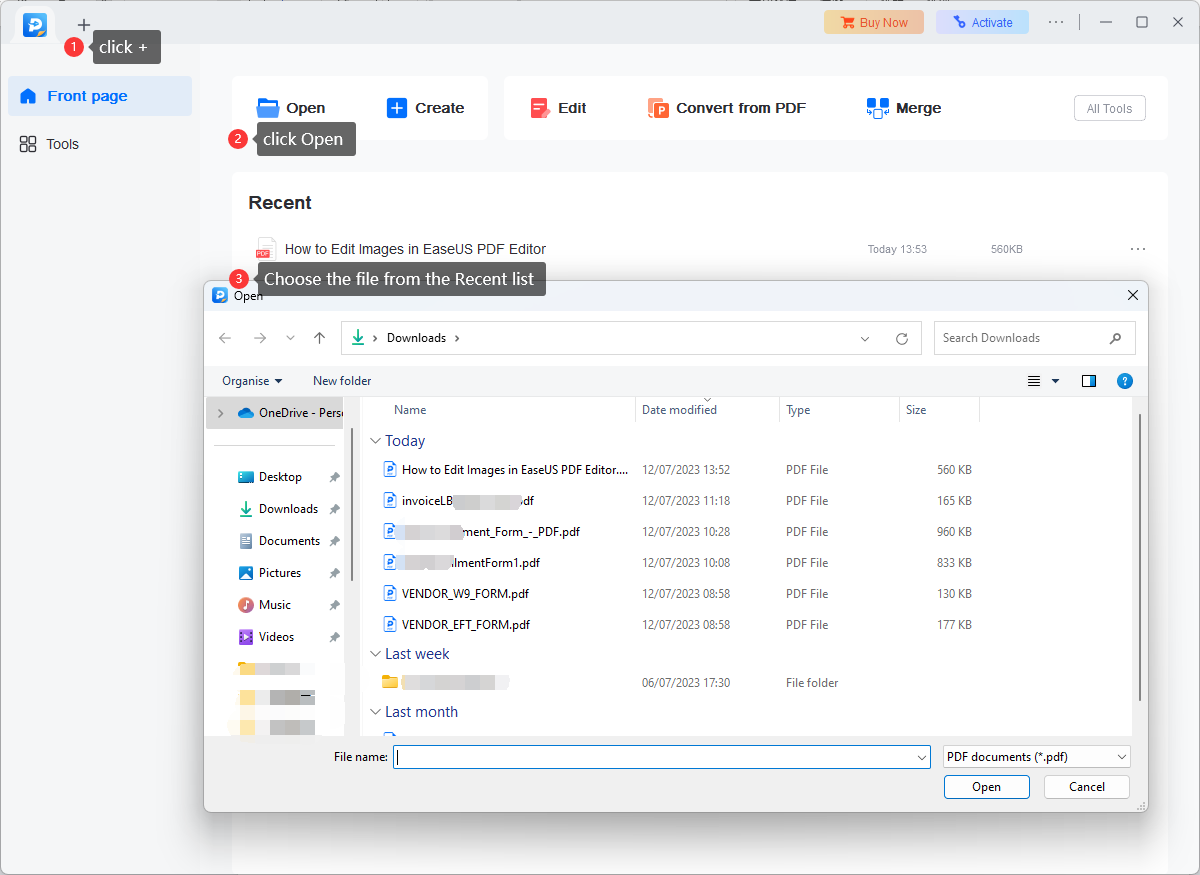
There are multiple methods to open a PDF file:
1. Click on the + icon at the top of the software and navigate to the location of the PDF file.
2. Click on Open on the Home Page and browse for the PDF file.
3. Find the PDF file in the Recent List.
View PDF
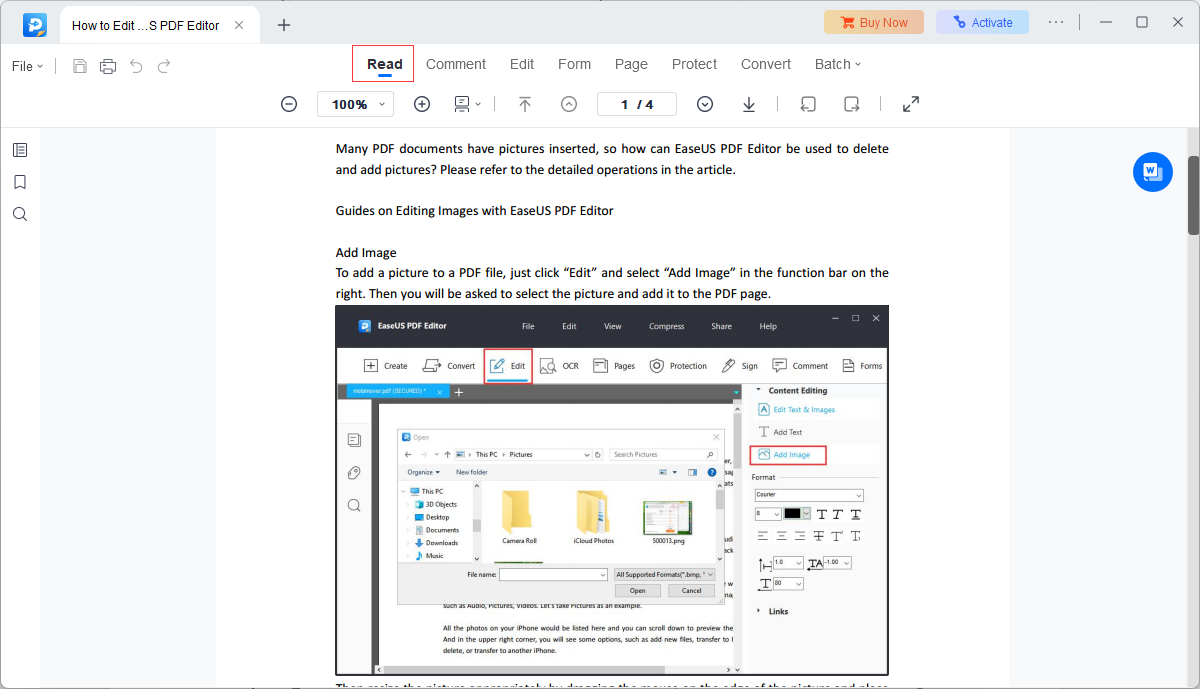
The program provides Read Mode for enthusiasts of eBooks. Please refer to this screenshot to find the Read Mode.
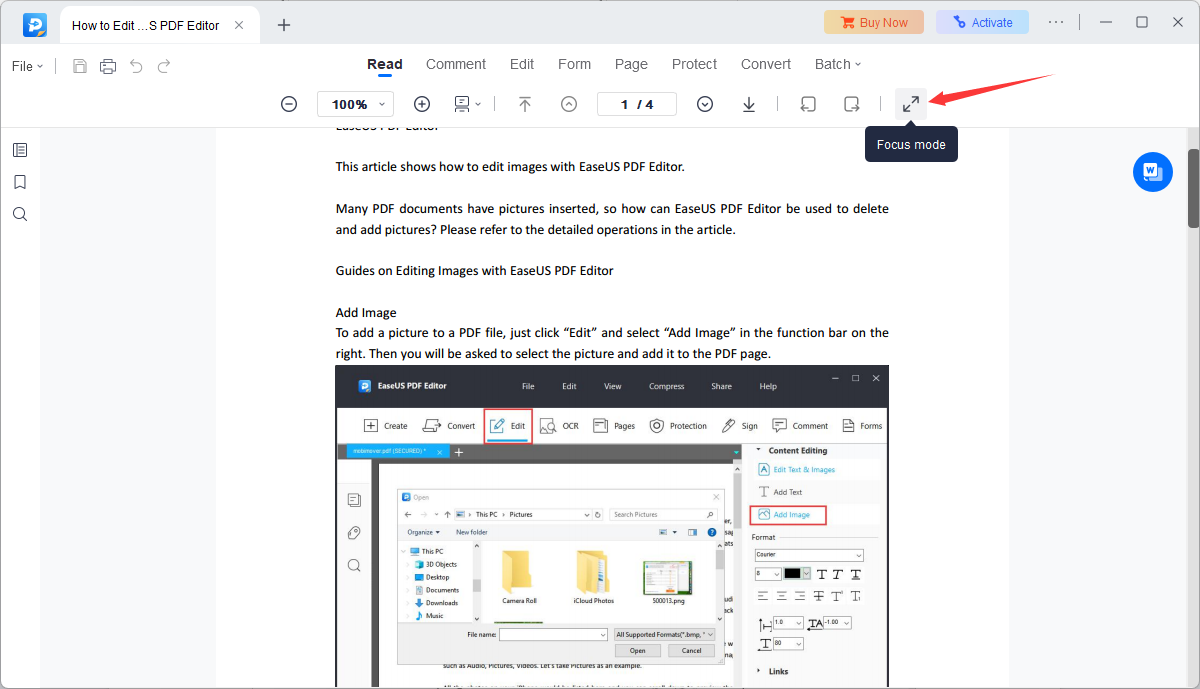
Apart from Read Mode, you can also choose Focus Mode to view a PDF document. (To exit the focus mode, just press the Esc key).
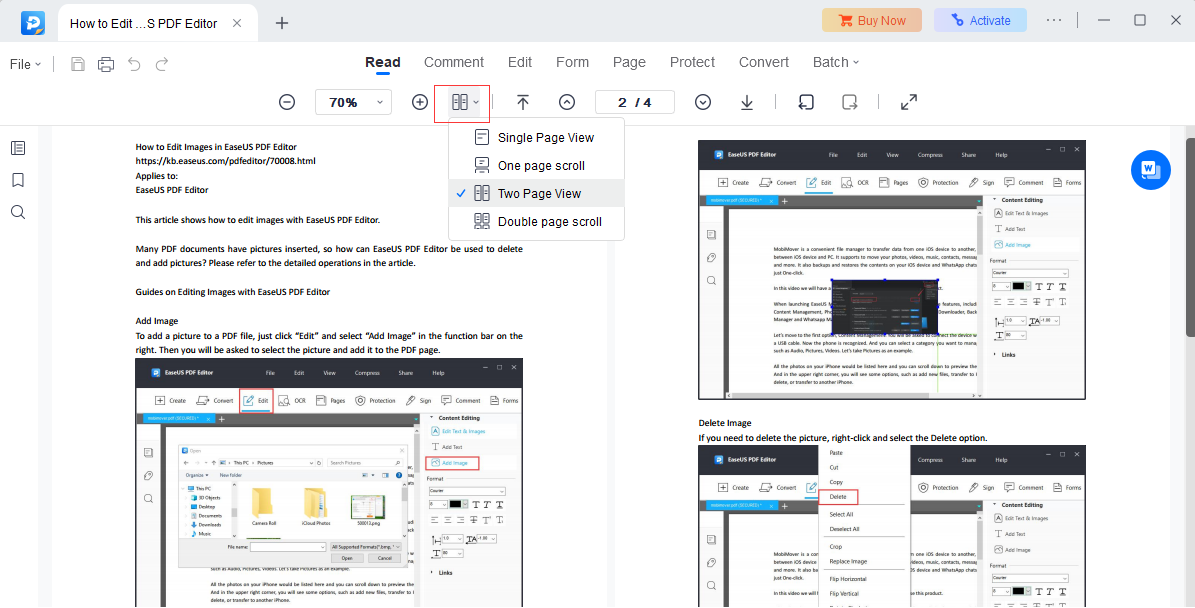
Page Layout
In Page Display, you have the option to conveniently adjust the page layout according to your preference for reading PDF files. For instance, you can choose between single page view, one page scroll, two page view, double-page scroll, and more.
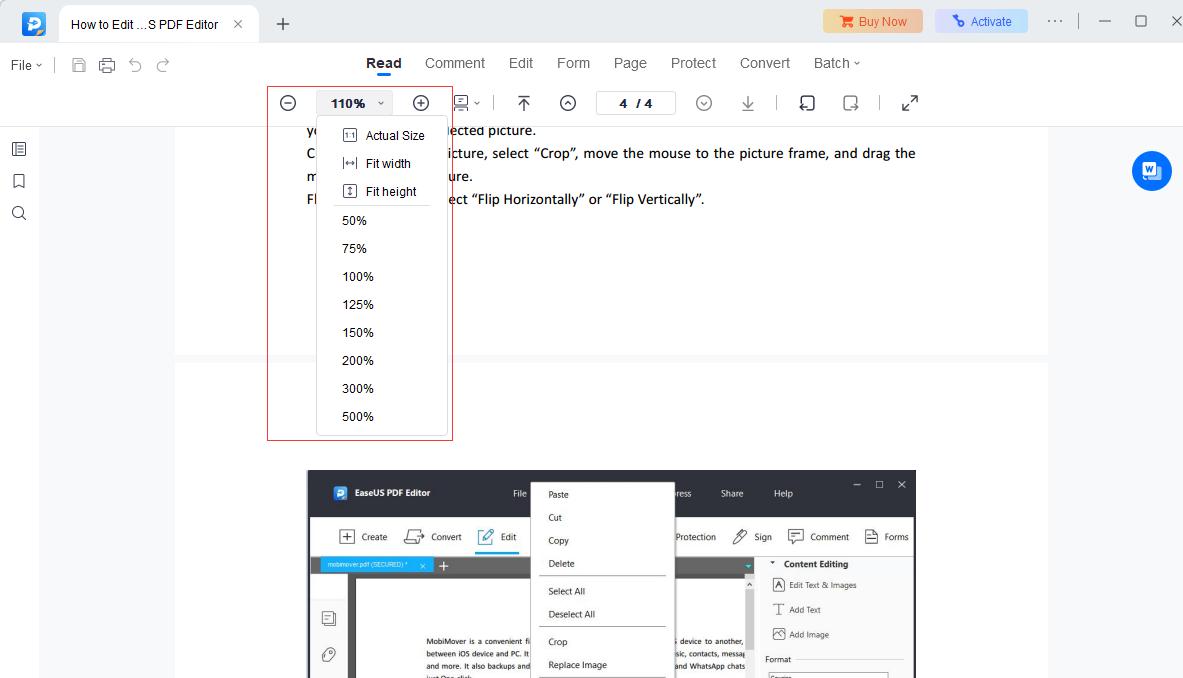
Zoom in/out
The top navigation bar enables users to conveniently adjust the display of the file by zooming in or out. It provides various page zoom levels, such as actual size, fit width, fit height, and more. Additionally, you can also zoom in or out directly by simultaneously pressing Ctrl on your keyboard and scrolling your mouse.
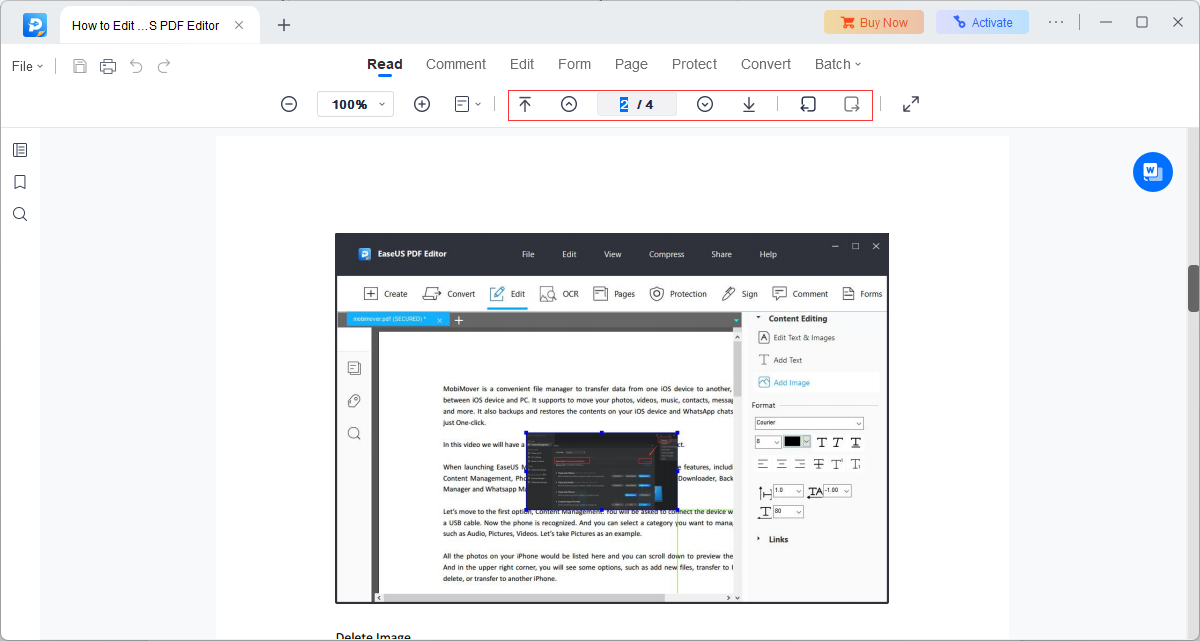
Navigate
In EaseUS PDF Editor, navigating through the document is effortless with one-click access to the first page, last page, previous page, next page, preview view, and next view. What’s more, at the bottom of the program, the navigation bar allows quick access to find a certain page number and go to that page.
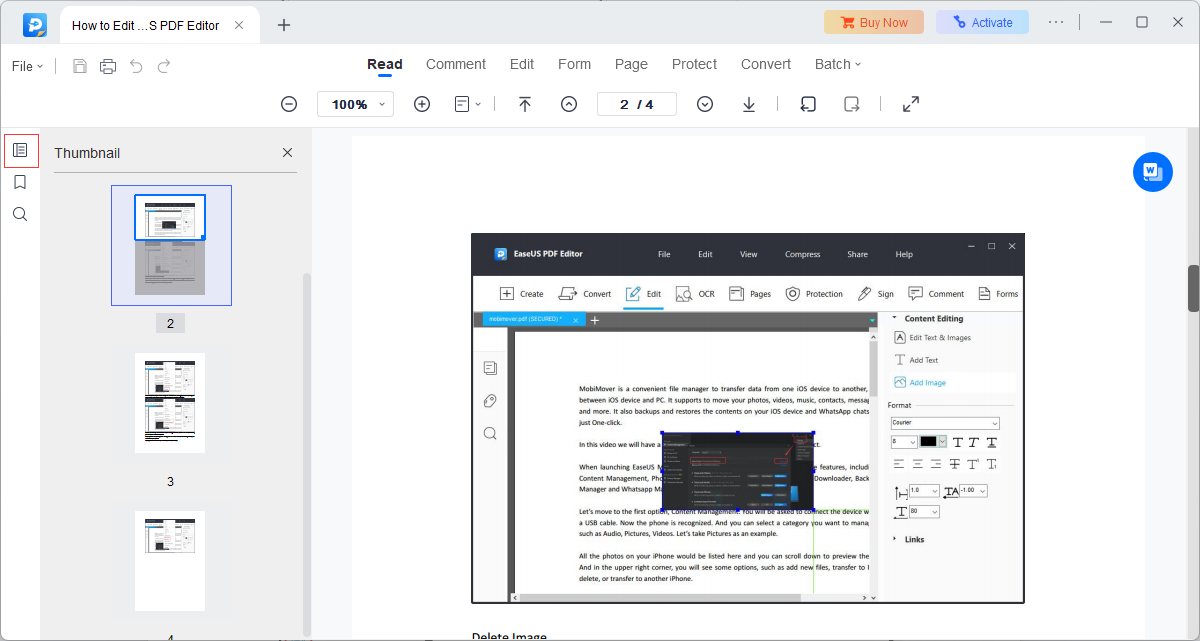
The navigation panel located on the left side of the main interface also provides easy access to various pages, and you can preview the thumbnail of each page with it.
Show/Hide
If you wish to navigate to a specific chapter without scrolling through the entire document, you can utilize the bookmark tool. By clicking on the bookmark icon located on the left side of the window, you can easily jump directly to your desired section.
Actually, Show/Hide can also work for Thumbnail and Search.
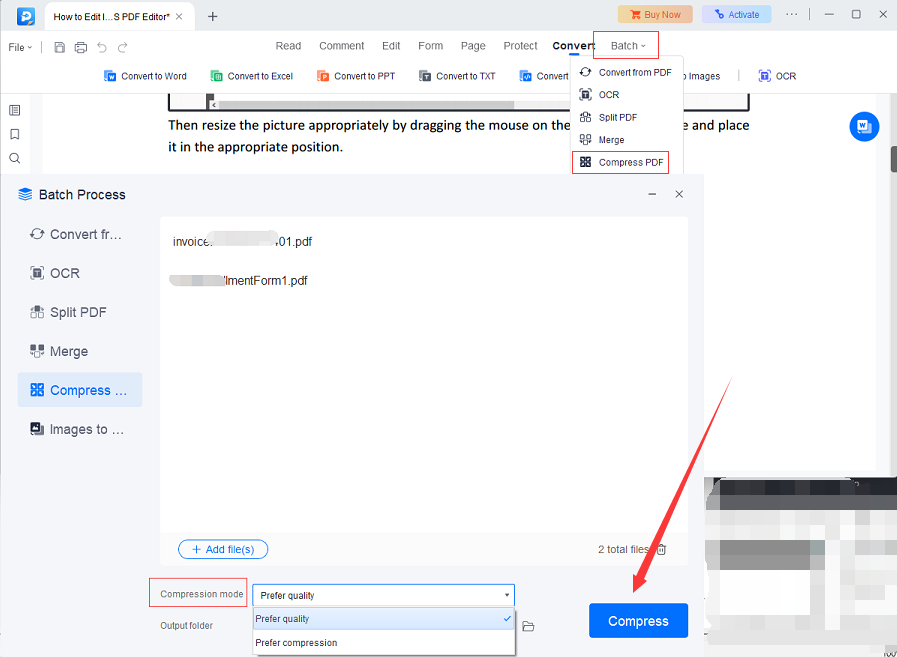
Compress PDF
EaseUS PDF Editor is equipped with a feature that enables you to reduce the size of your files. To utilize this feature, please locate Compress PDF in the Batch option. Upon selecting this option, a pop-up window will appear where you can add the desired files for compression. Additionally, you will have the option to choose between prioritizing quality or compression. Once you have made your selection, simply click Compress to initiate the process.
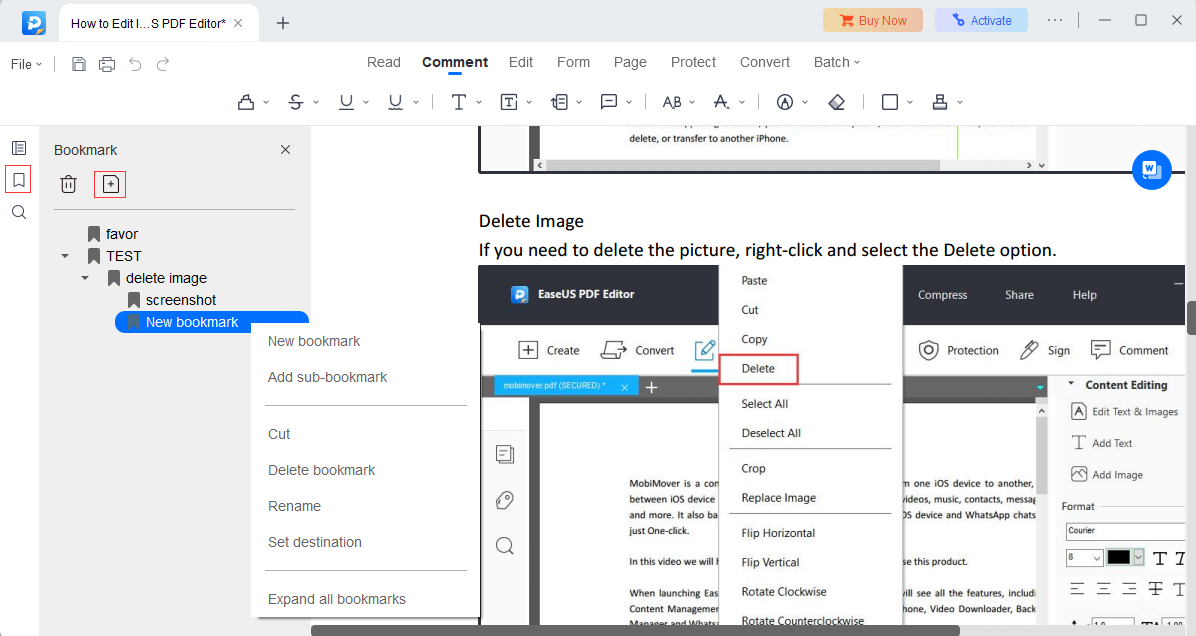
Bookmark
Clicking on the Bookmark icon on the left navigation panel will allow you to access the list of bookmarks within the document, enabling easy navigation to specific pages. Additionally, you have the ability to add or remove bookmarks as desired.
To add a bookmark, simply locate the page you wish to bookmark and click on the + icon. Subsequently, you can assign a name to the bookmark for easy reference. In order to rearrange the order of bookmarks, right-click on the desired bookmark, cut and paste it to the place where you want. Lastly, to remove a bookmark, simply select it and click the recycle bin tool, or click Delete bookmark directly.
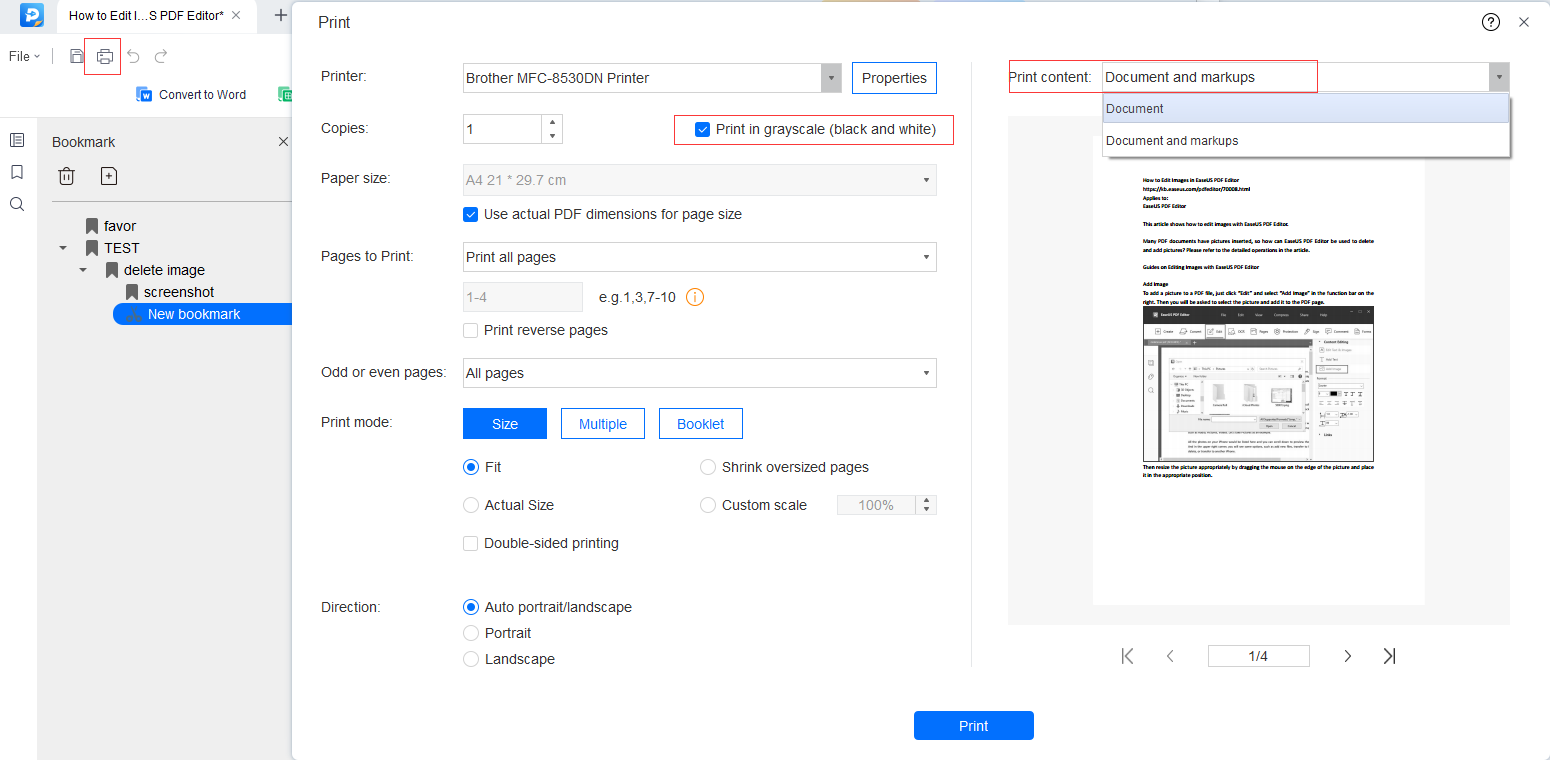
With the Print function, you can choose to print in grayscale (black and white), and even print the markup along with the document.
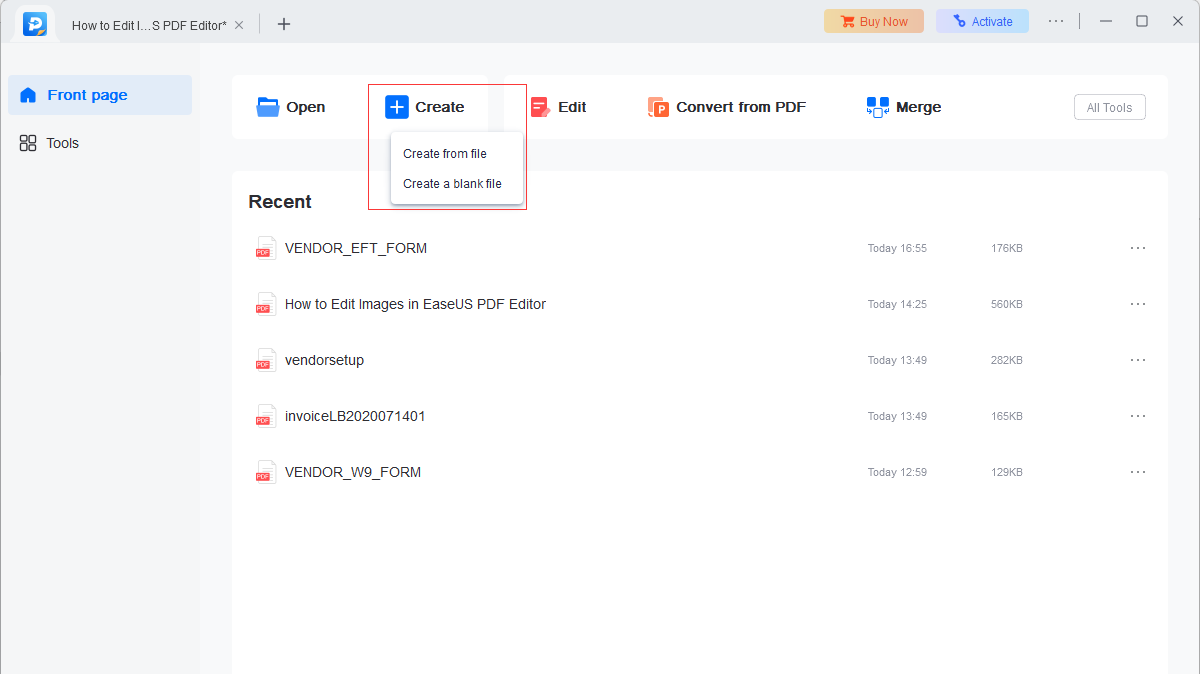
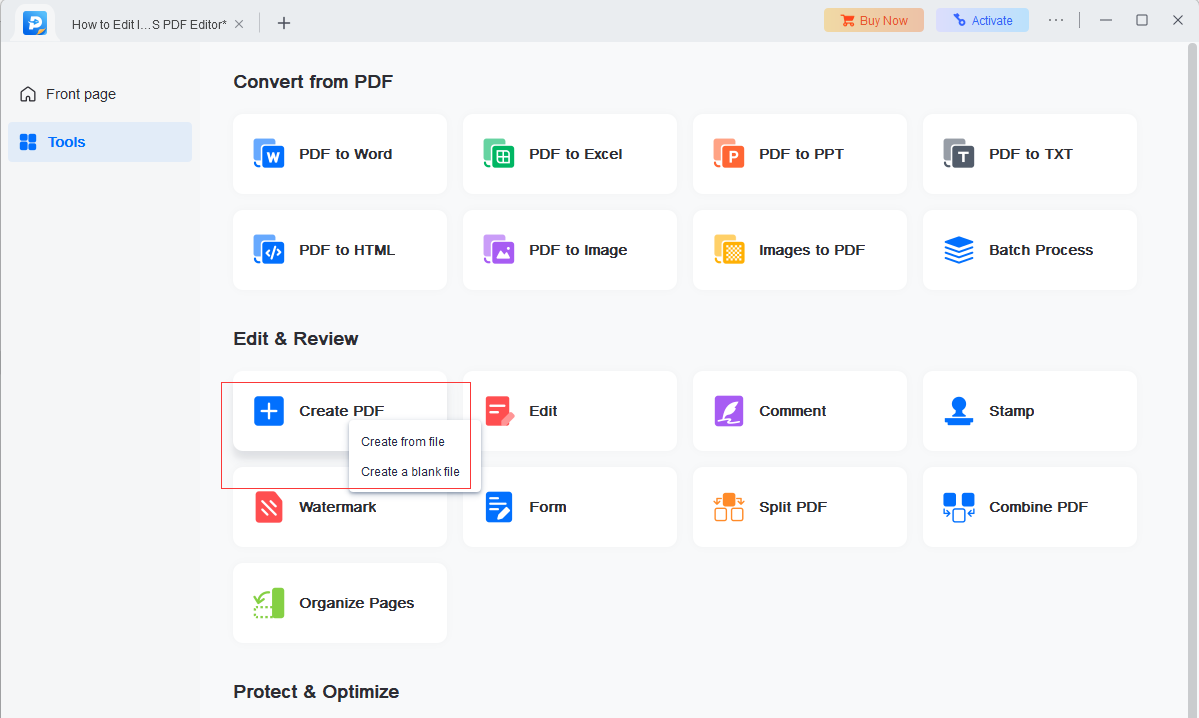
Create a PDF
Whenever you wish to generate a fresh PDF file or even transform images or documents into PDF format, you can utilize the Create function. The Create feature can be found on the Front Page or within the Tools Section. It presents two alternatives, namely creating from a file or creating a blank PDF.
By creating from a file, you are able to convert these files into PDF effortlessly.
Convert PDF
This tool can also be used to convert PDFs to other formats. There are 3 methods to make the conversion.
- From the Front Page
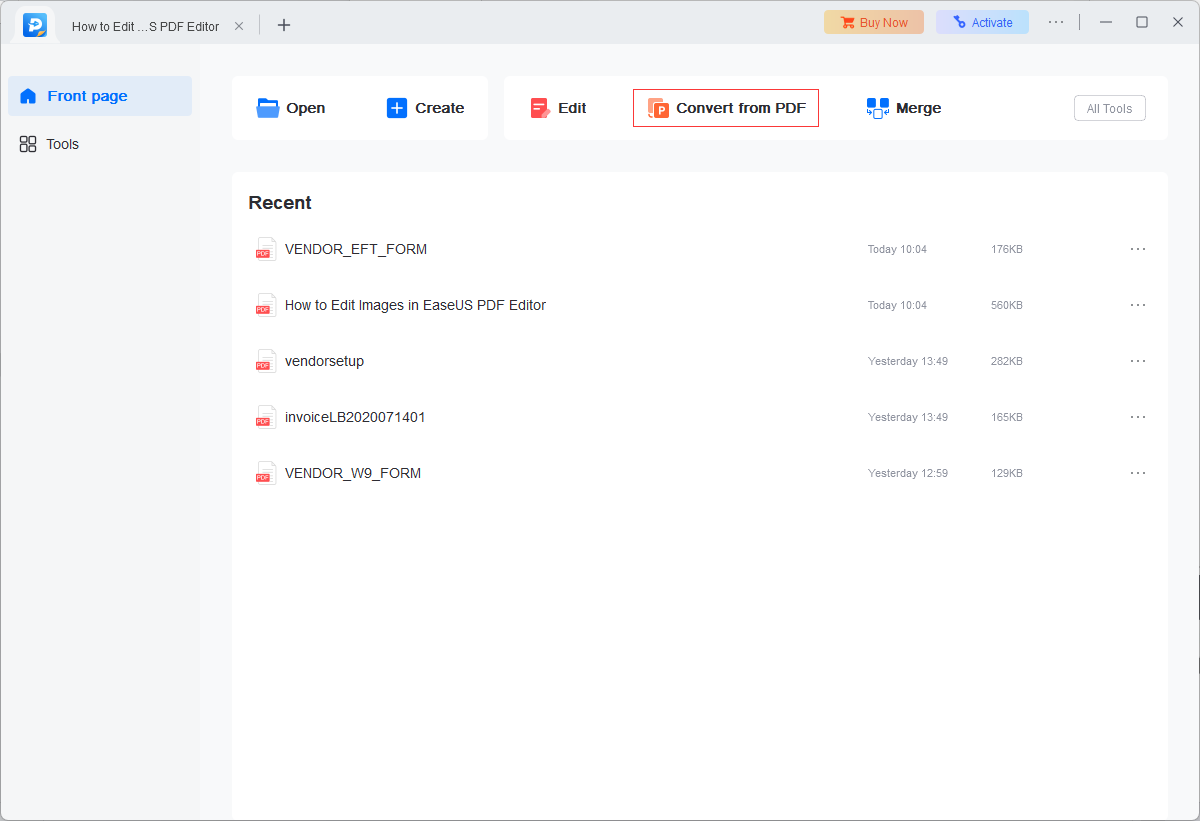
- From Tools
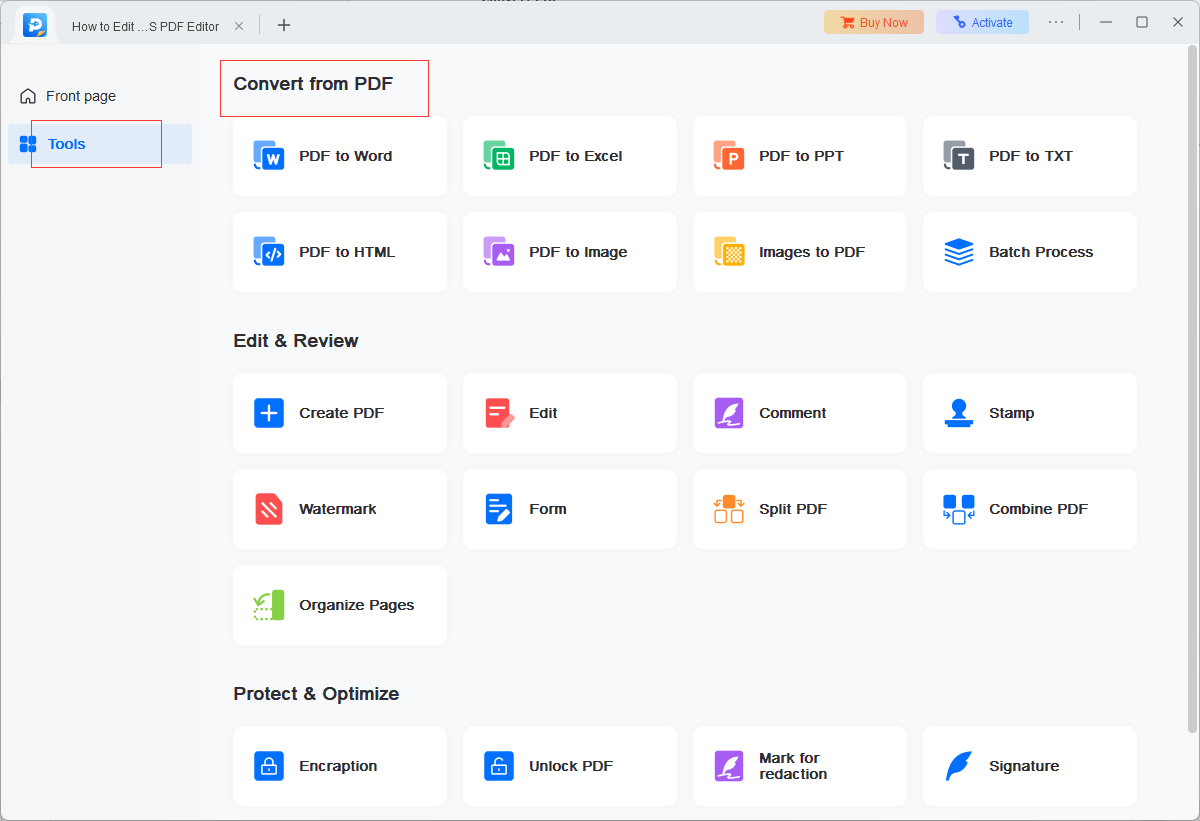
- From PDF Viewer
Edit a PDF
This software offers a wide range of editing options. You can simply click on Edit on the toolbar to modify the content and include hyperlinks.
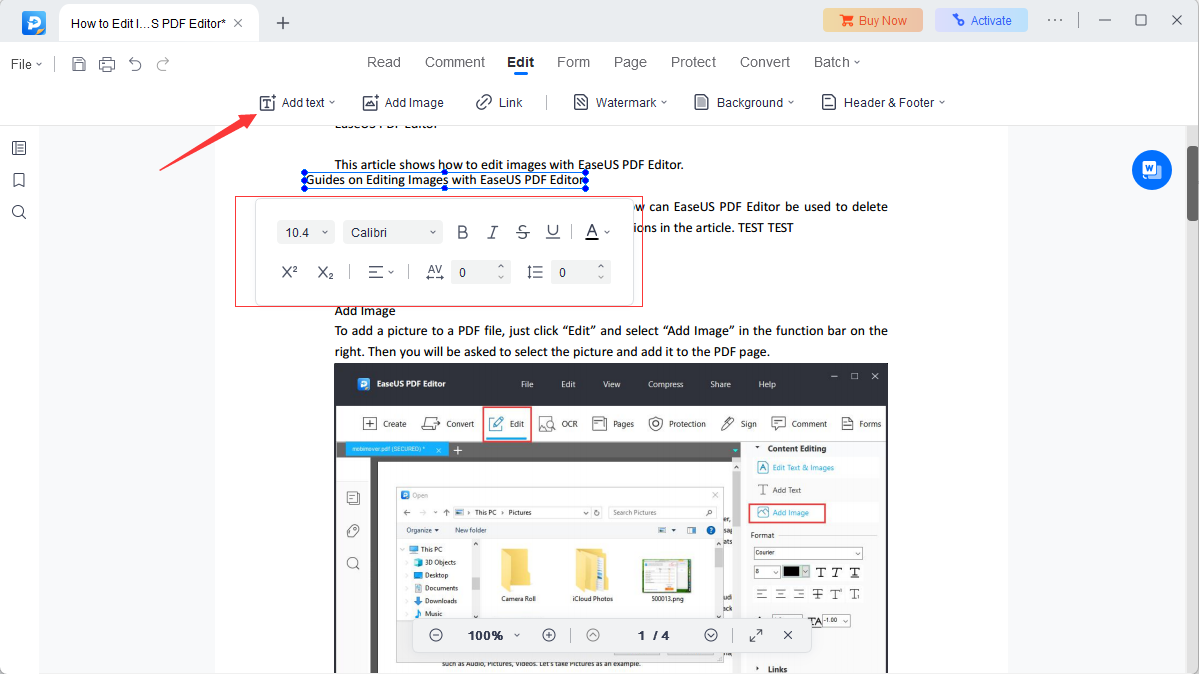
Text
You are able to directly edit the text and images in the original document. If needed, you can click on Add Text to insert text in any section of the page. Moreover, you have the option to modify the font, size, and color of the text, as well as apply formatting such as underlining, bold, or italics.
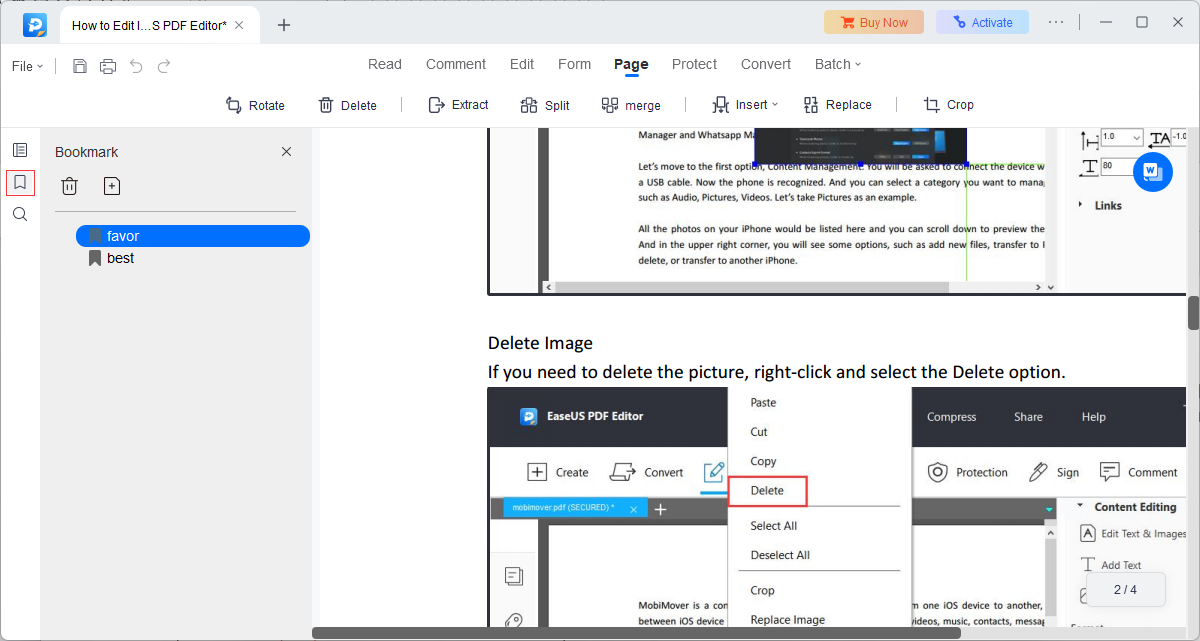
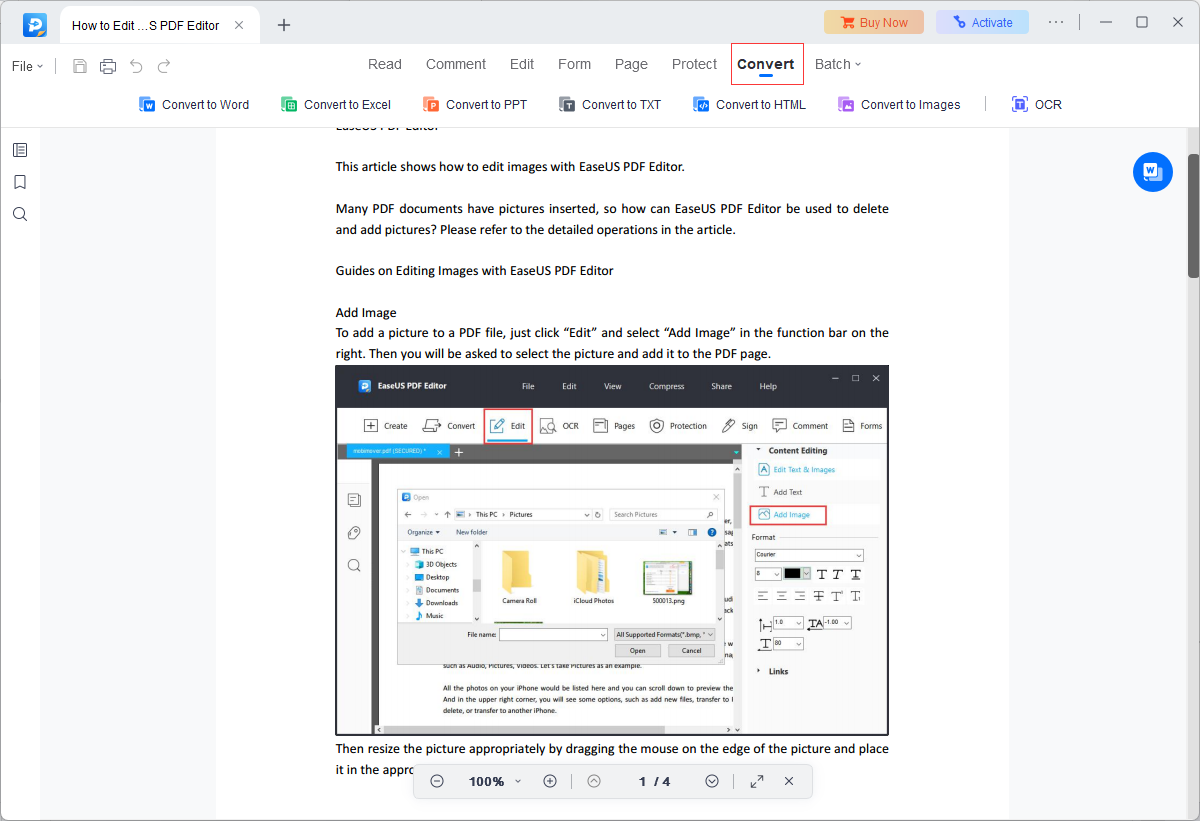
Image
Add Image feature allows you to insert images into a PDF and adjust their position, orientation, and size.

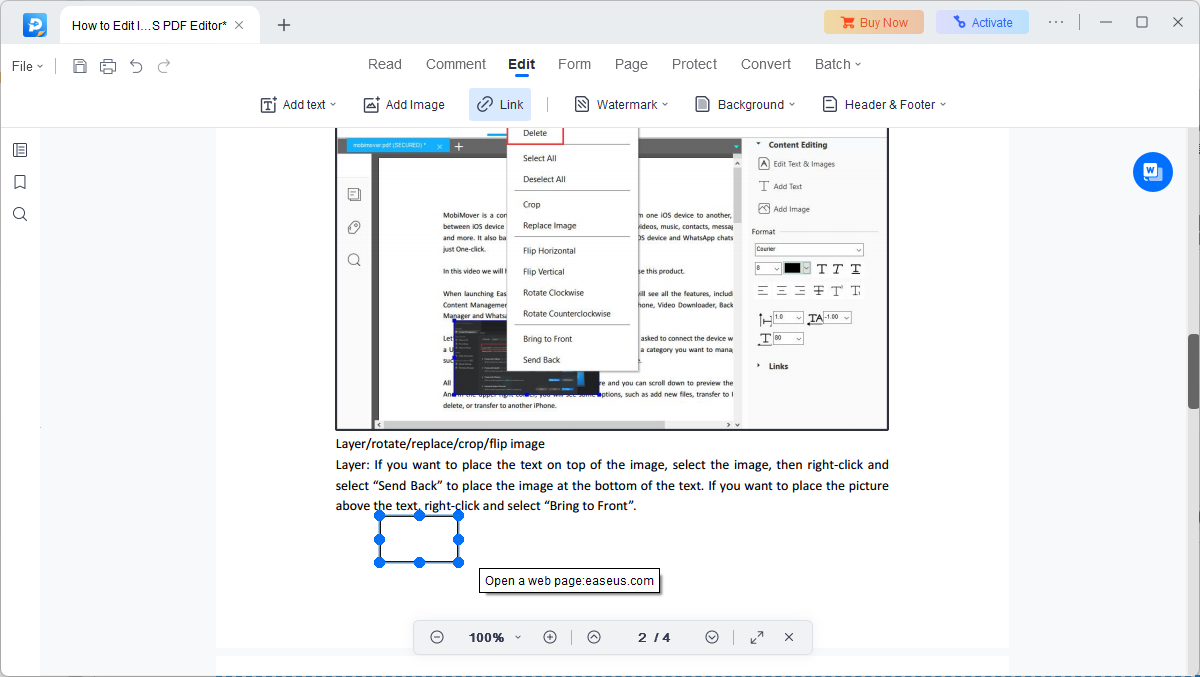
Insert links
When editing a PDF document, you have the option to directly insert a hyperlink into the text. Upon reading the file, you can simply hover over the link with your mouse to instantly navigate to the corresponding page view, file, or web page.
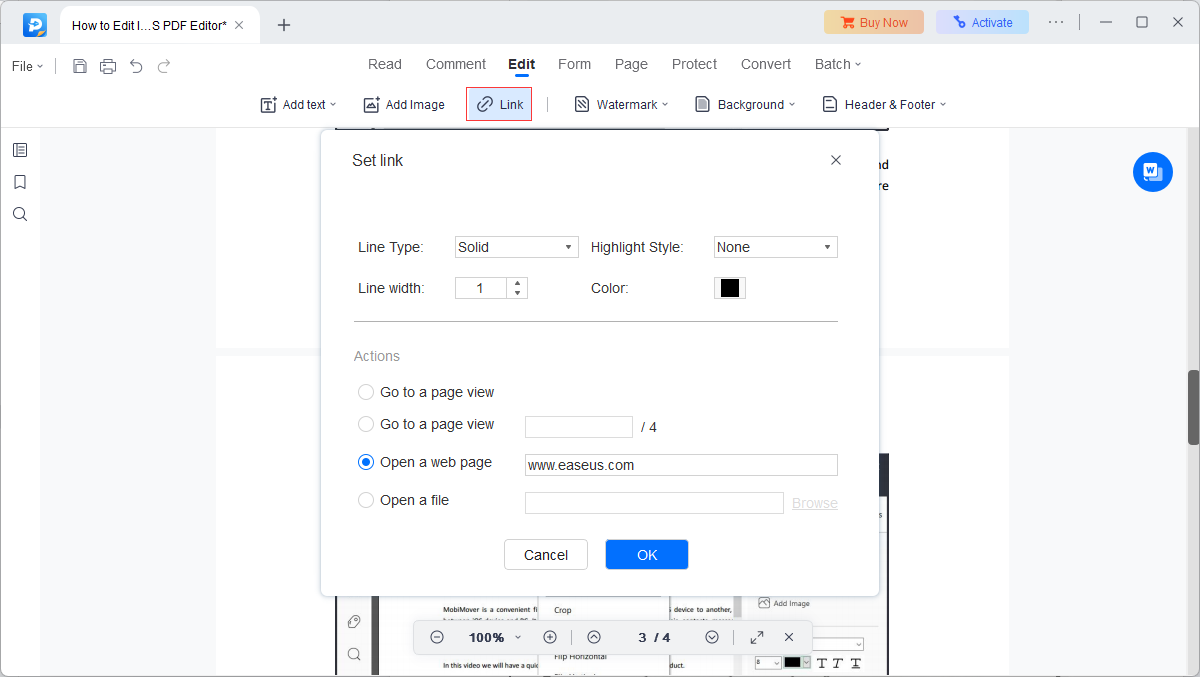
If you want to add a rectangle link, click Links, then drag a rectangle region on the page. Once it's done, a window will appear asking you to customize the appearance of the link and select the destination.
Pages
The tools for managing PDF pages are categorized under Pages. You can click on the button to access additional tools below.
Manage PDF Pages
Insert From PDF: You can append other PDF files to the current document and choose where the pages will be added.
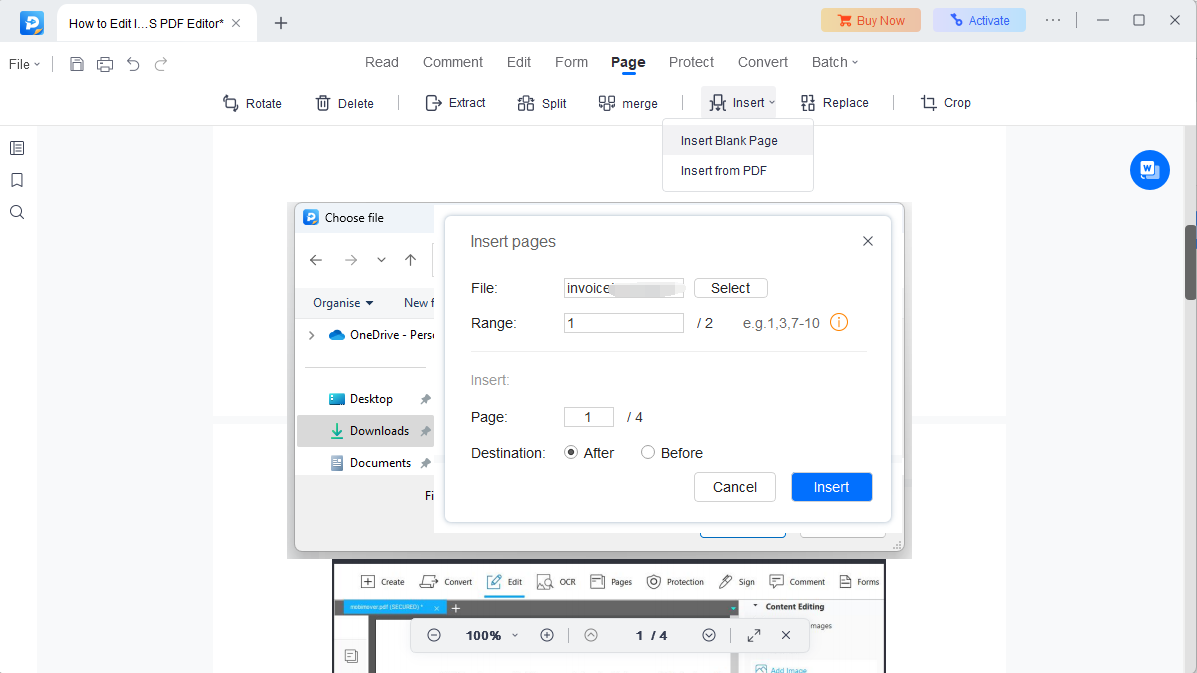
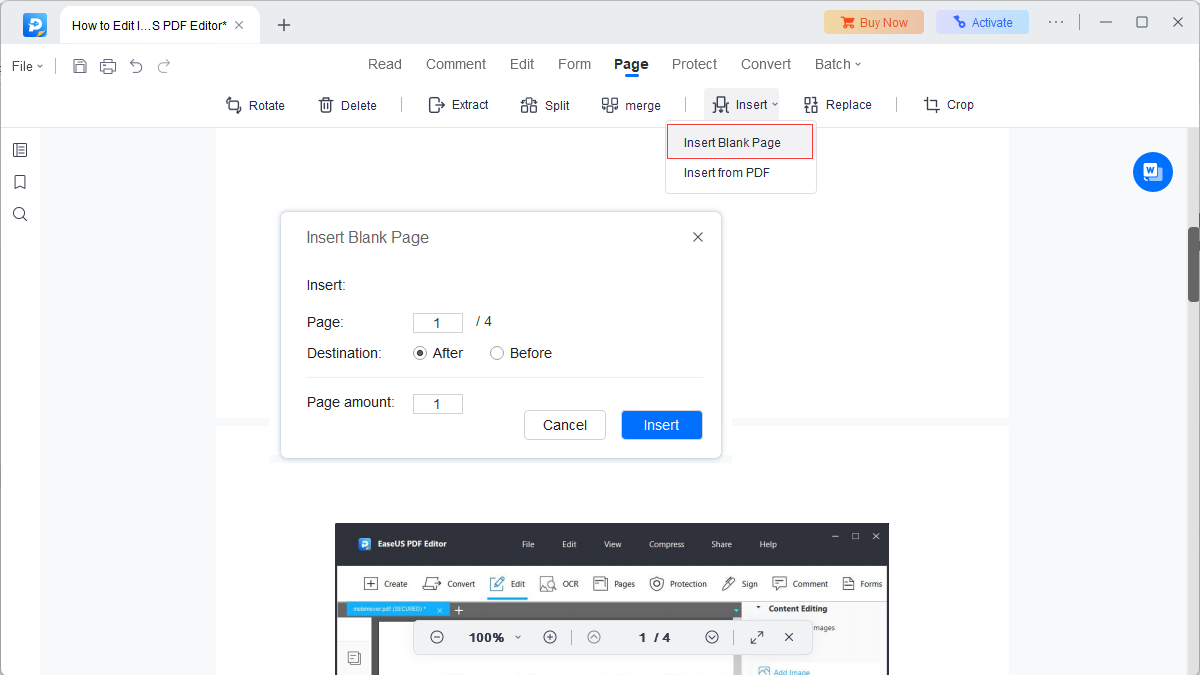
Insert Blank Page: Insert a blank page to any part of the document you want and set how many pages you want to add.
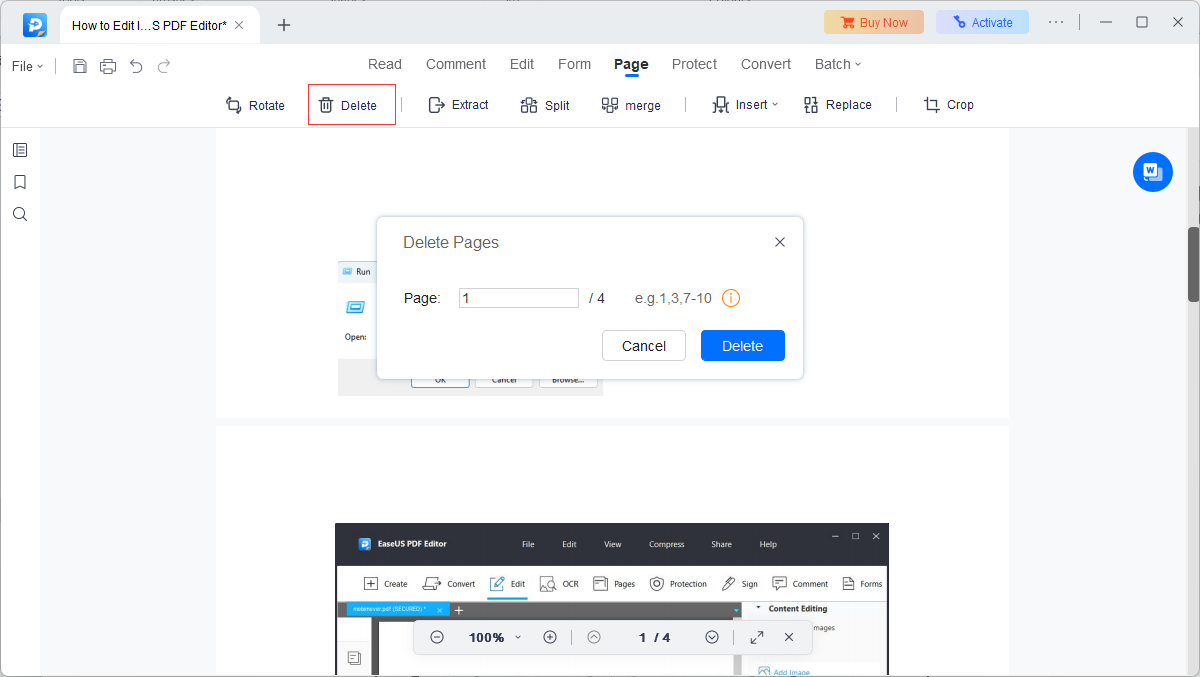
Delete: Specify the page(s) that you want to delete from the whole document.
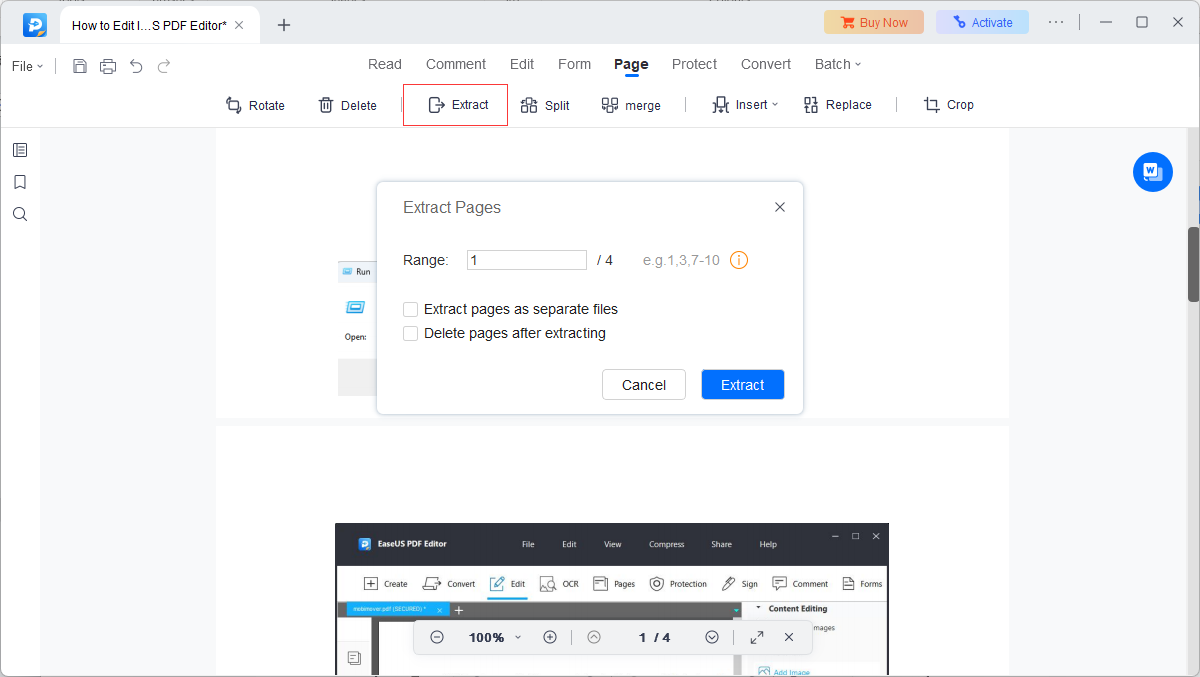
Extract: You can utilize this function to extract specific pages by inputting the page number directly. Enter 1,3 to extract Pages 1 and 3. Enter 7-10 to extract Pages 7 to 10.
You have the option to extract pages as separate files and delete them once the extraction is complete.
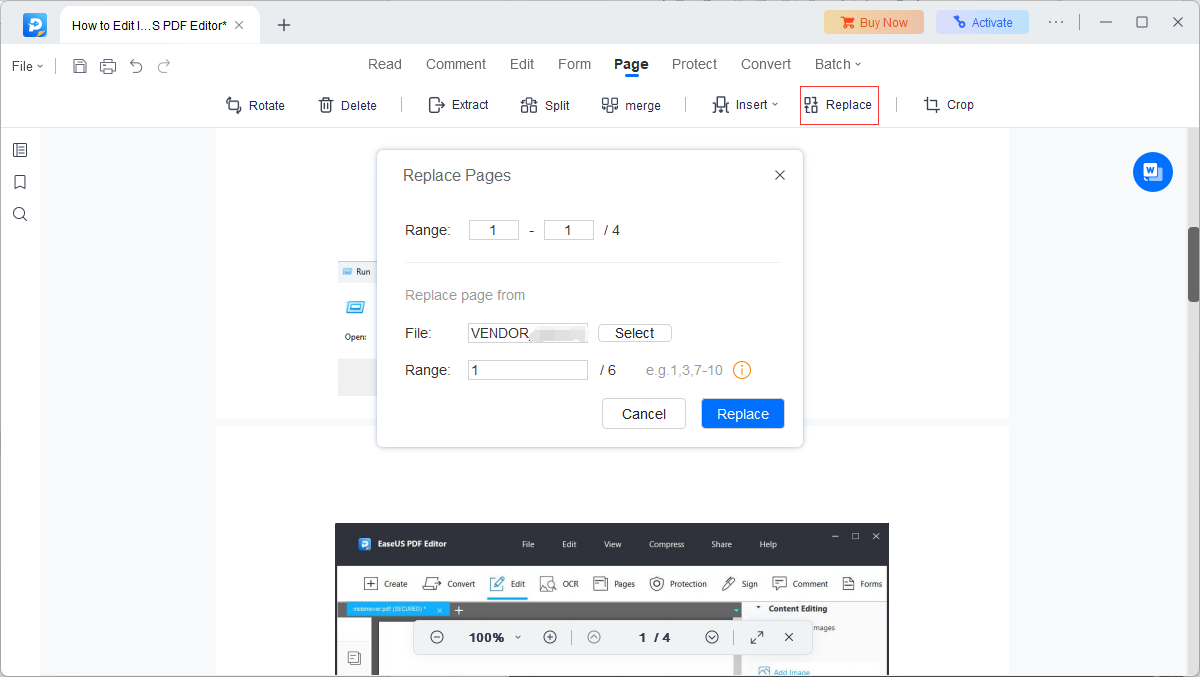
Replace: Click on Replace and select a document initially. Following that, you can select the page(s) you wish to substitute in the target file and subsequently modify the page range for insertion.
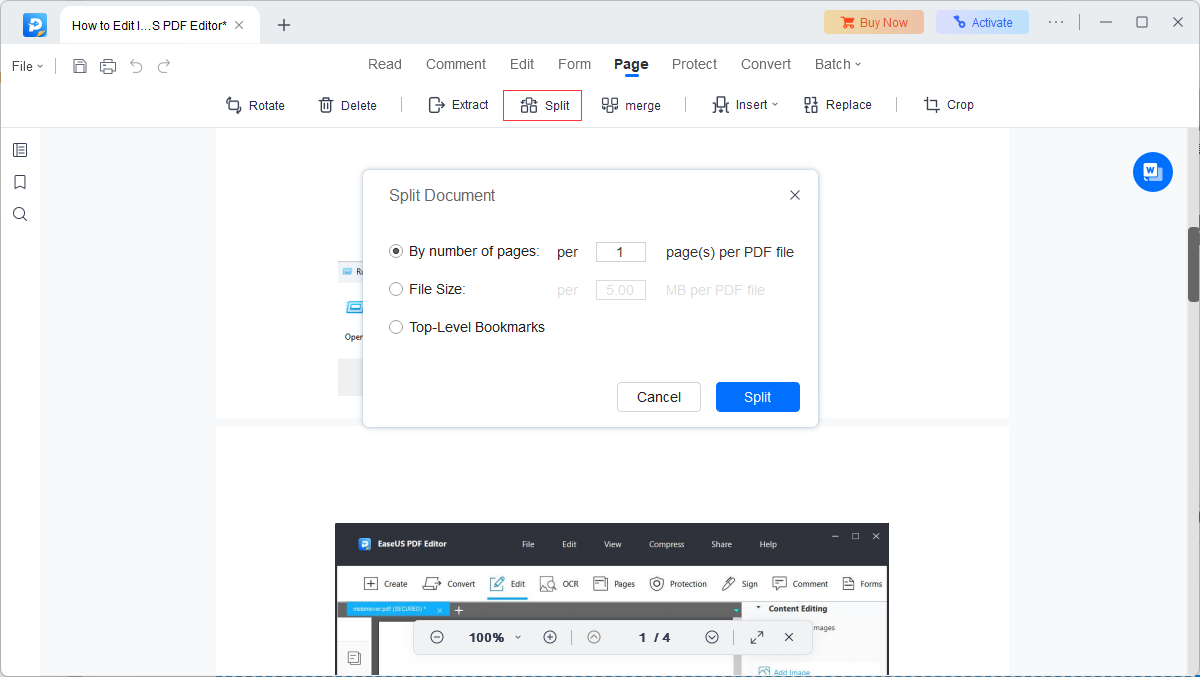
Split Document: You can easily split PDF documents based on the number of pages, file size, and top-level bookmarks. If you wish to divide the file into multiple pages, with each page containing less than 10 pages, you can specify the maximum number of pages as 10 for splitting. File Size mode enables you to split the file while ensuring that each resulting document remains under a specific file size.
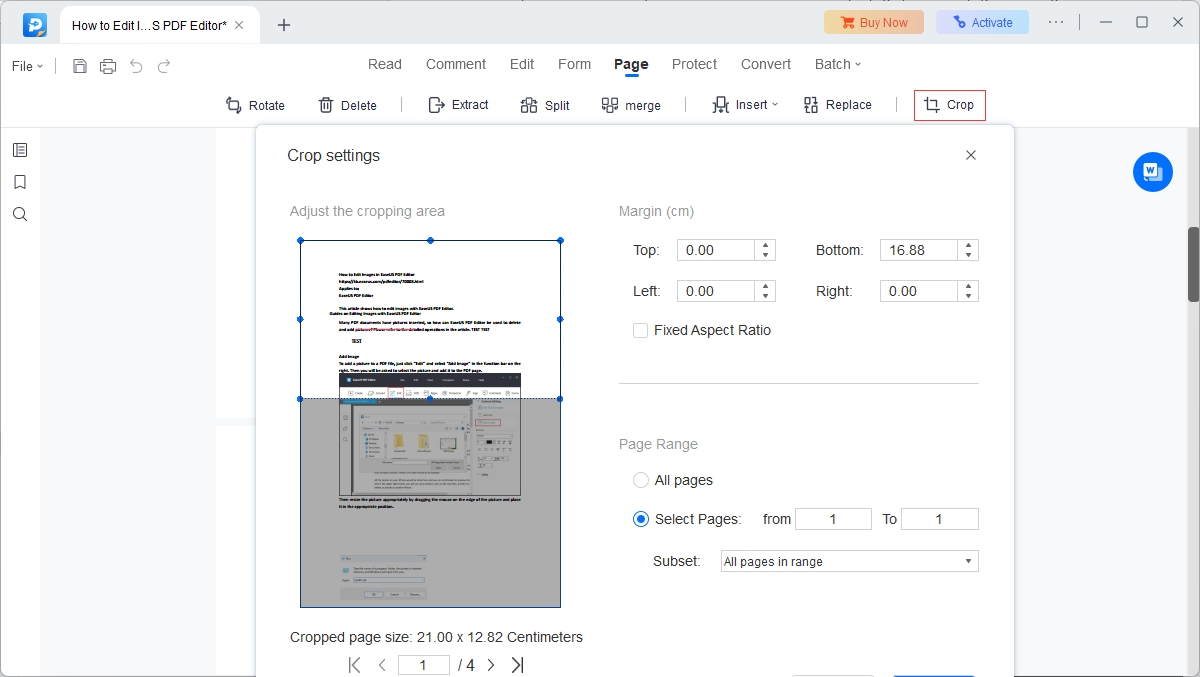
Crop: in the Crop dialog box, you can customize the selected area. Note that the numbers beside Top, Bottom, Left, and Right mean the distance between the selected area border to the document border. And if you want to crop in batch, you can set page range and the program will crop the selected pages according to your needs.
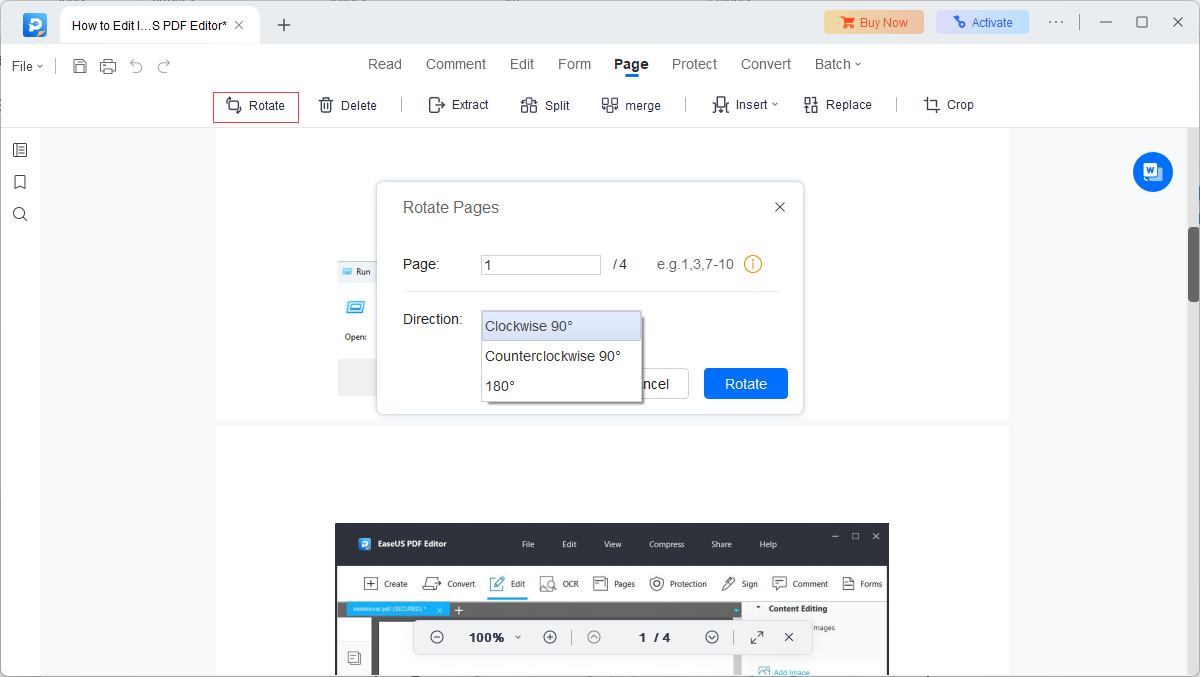
Rotate: Customize the rotation direction and specify the desired page range for permanent rotation.
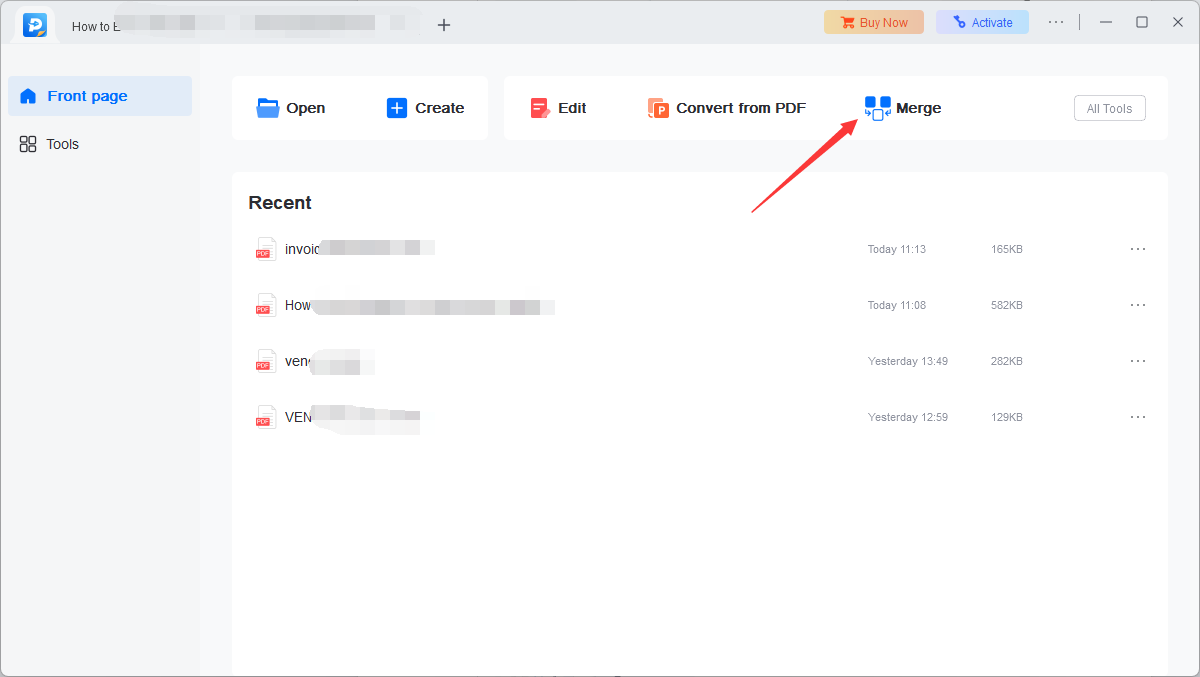
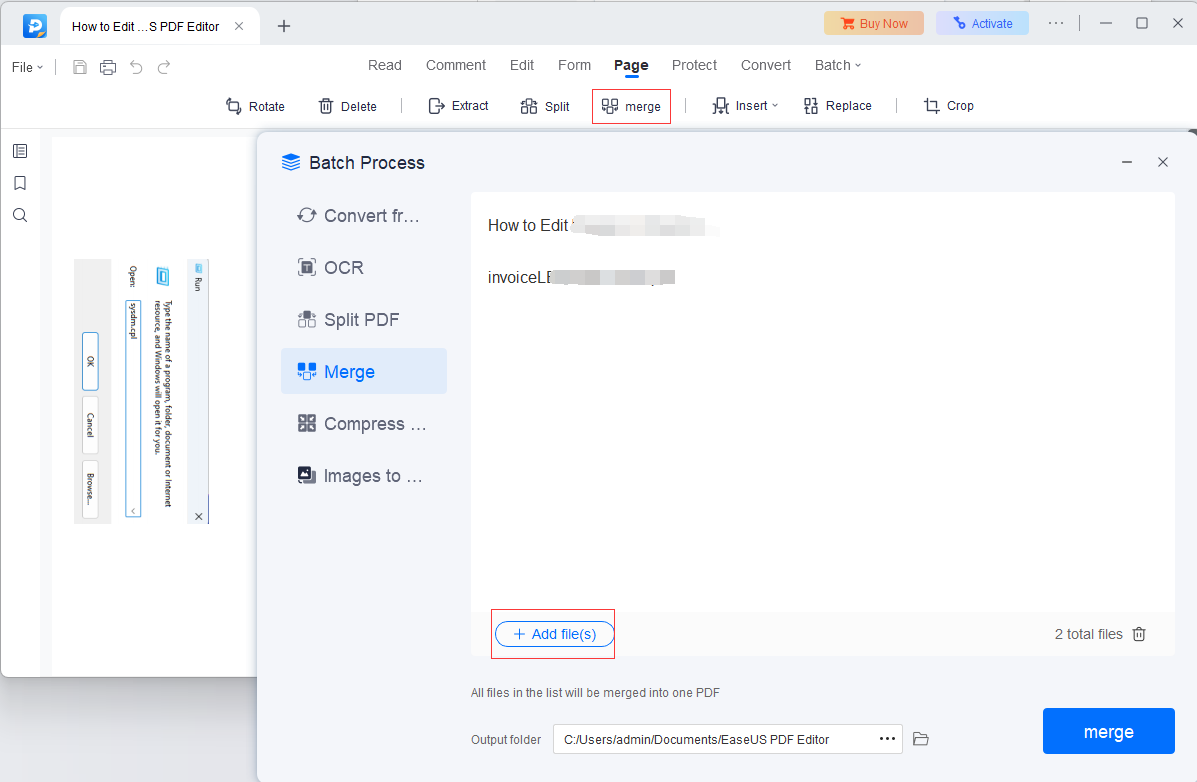
Merge: If you wish to merge several PDF files into a single file, you can easily access this feature directly from the Home Page. You can also use this feature when editing the pages. After you click Merge, a window will appear, where you can add the files for the  merging process. Once you have selected the desired files, they will be displayed in a list format, allowing you to rearrange their order as desired by moving them up or down. Finally, to confirm the merging process, click the Merge button.
Adjust Page Design
Header & Footer: You can add, update and remove the header and footer of your document. A variety of settings are provided when customizing the appearance of the header and footer, including position, font, etc.
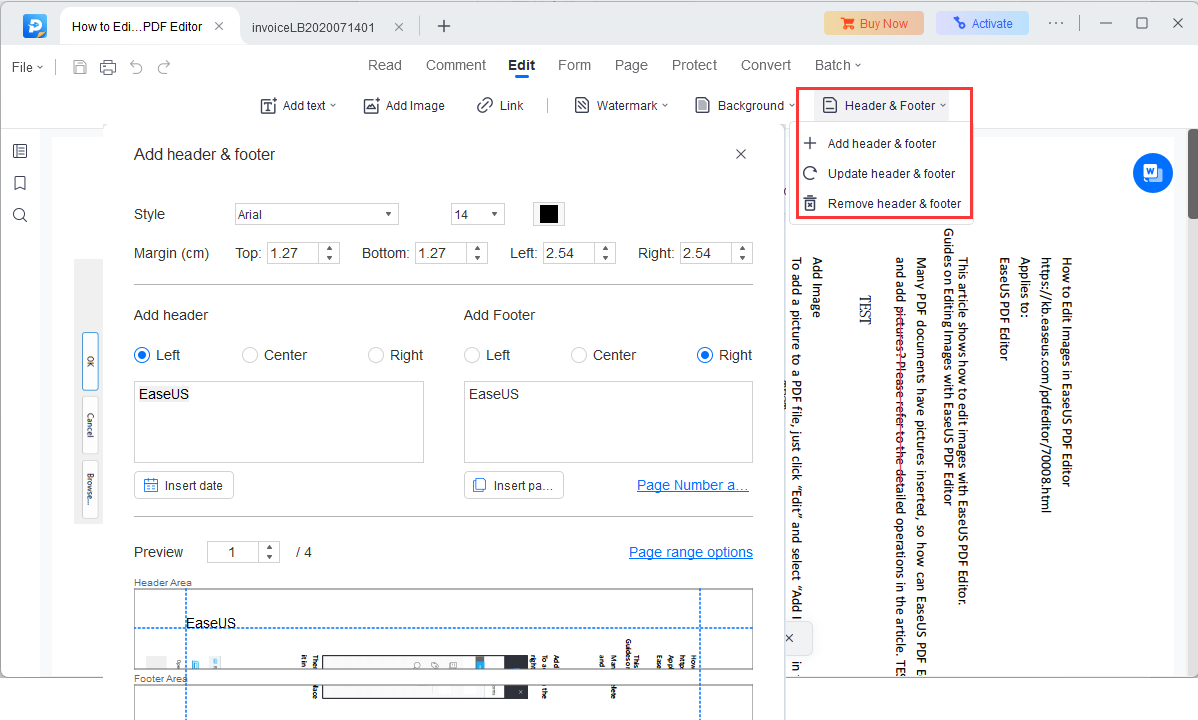
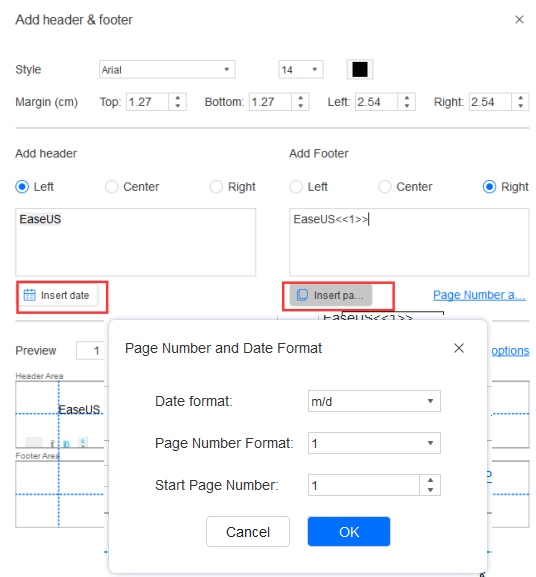
In this way, you can also insert a page number and date into a PDF file. Page Number and Date Format allows you to choose the way that page numbers and dates are displayed.
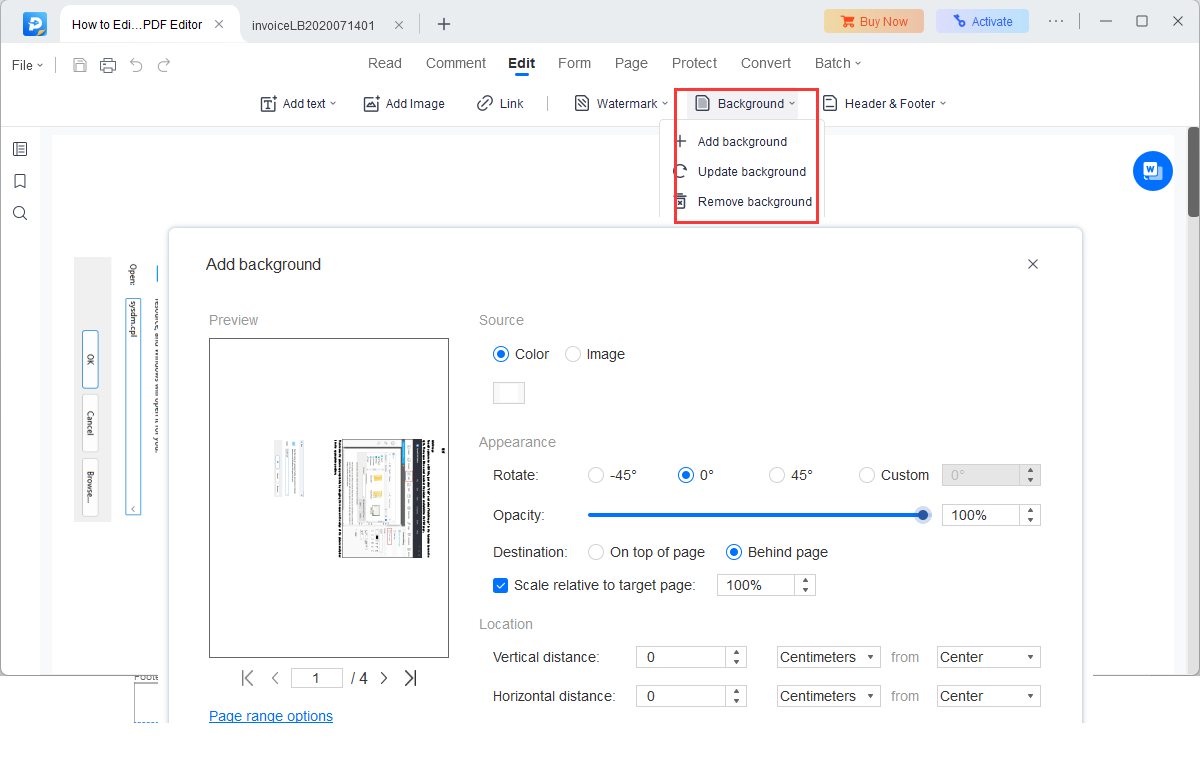
Background: You have the option to select a color or a specific page from the file to serve as the background. Additionally, you can customize its rotation, opacity, position, and other configurations. This allows you to modify or include PDF backgrounds according to your preference. Moreover, there are options to update or remove backgrounds as well.
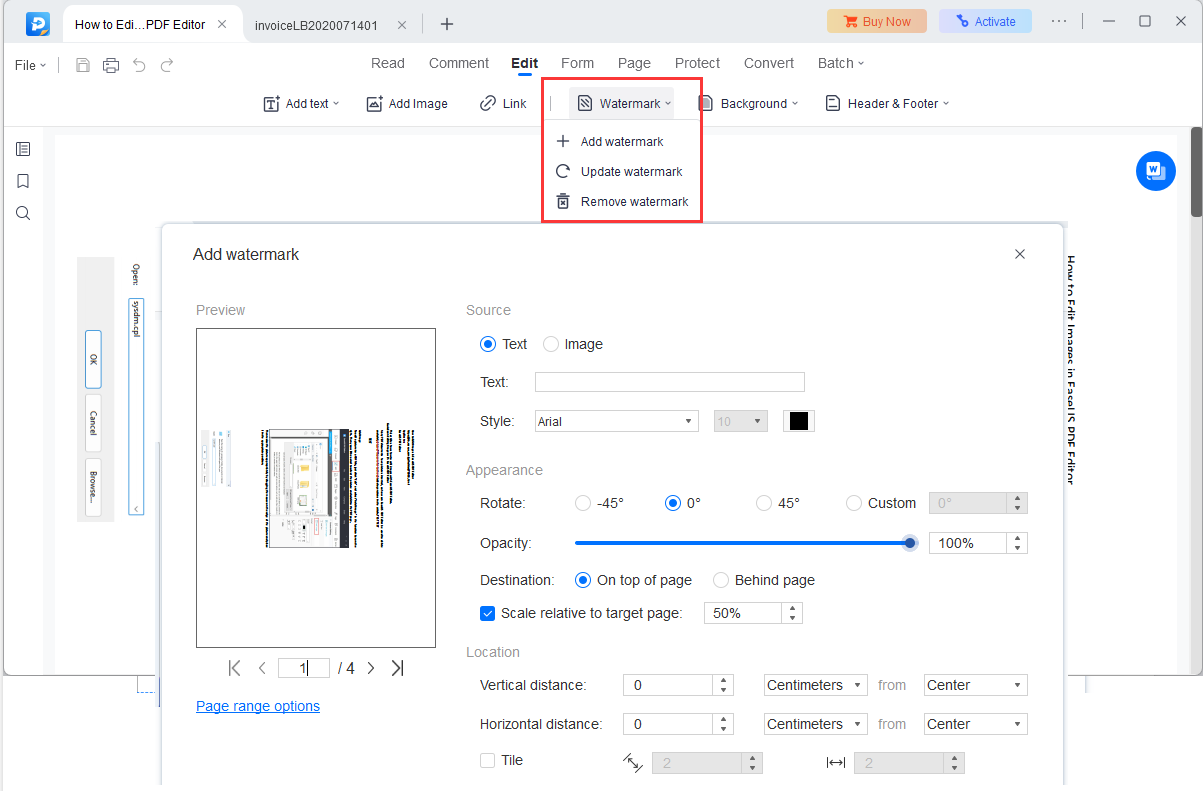
Watermark: You can effortlessly incorporate text or files as a watermark and personalize its visual style and placement. If necessary, you can also modify or delete watermarks.
OCR
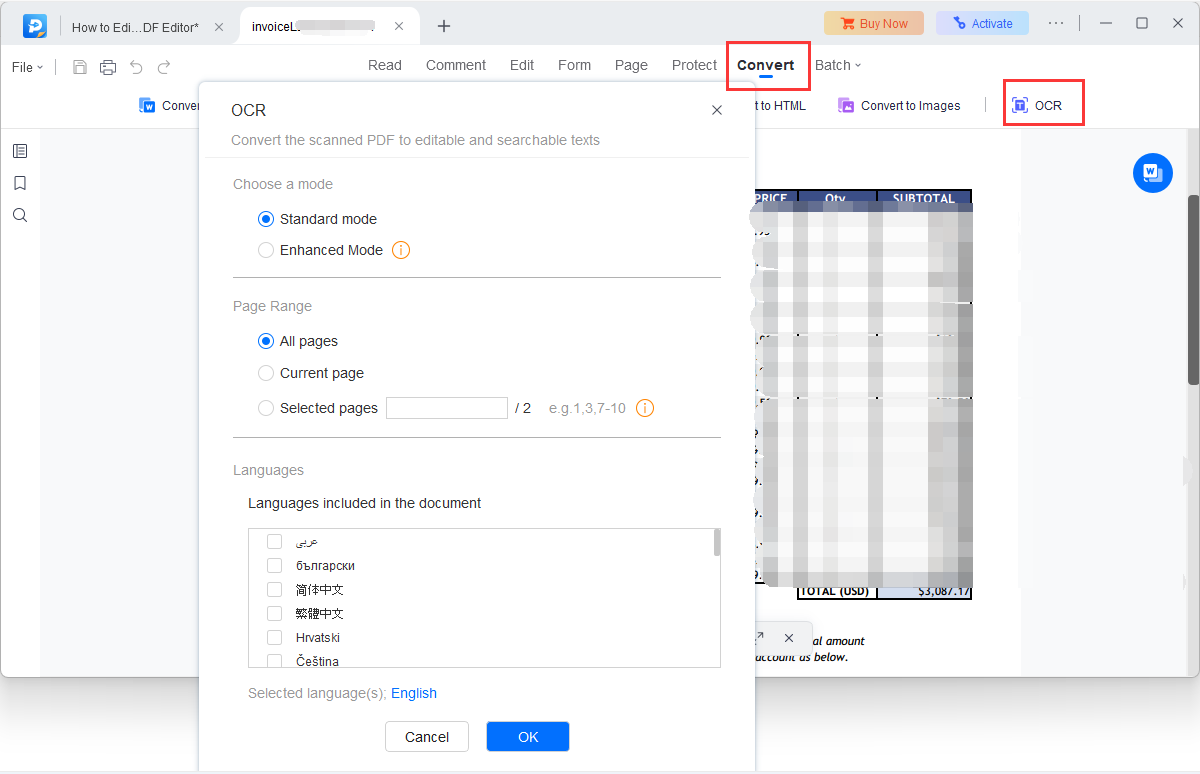
EaseUS PDF Editor provides an OCR function that enables you to scan PDF files and convert them into an editable format. Additionally, it supports a wide range of languages including English, French, German, Korean, Japanese, and more. Furthermore, users have the flexibility to select the desired page range for conversion, whether it be all pages or specific pages. With just a few clicks, you can easily make your PDF file editable.
Add Protection
With this feature, you have the ability to safeguard your file by applying a password or eliminating an existing security password.
Set Password
By selecting Protect > Set Password, you can secure your PDF documents by including a password to restrict access. This will also limit specific functionalities like printing and editing. Essentially, there are two types of passwords that can be utilized for encrypting the file: open password and permission password.
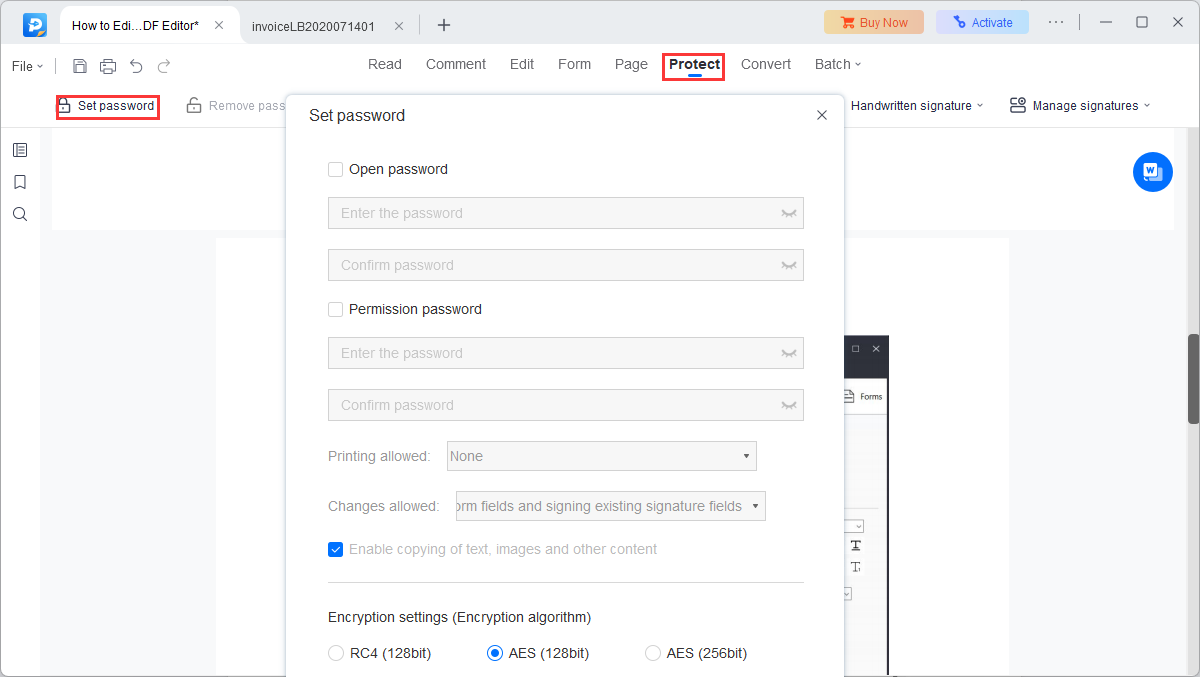
Open password: A password is required to enter when opening a PDF file each time.
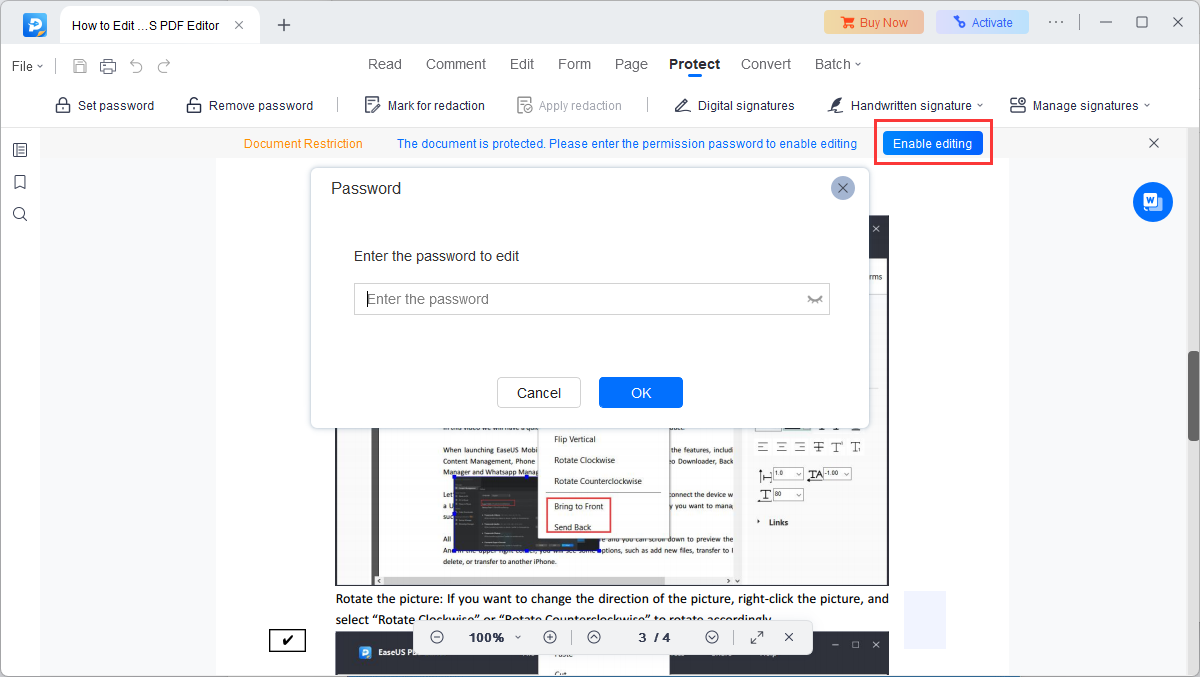
Permission password: If a permission password is enabled, you can open a PDF file without a password. However, a password is required when you change permission settings. Plus, you can restrict printing, editing, signing, or copying content in the PDF. And to enable editing, please enter the permission password by clicking Enabling editing.
Note: The two types of passwords cannot be the same.
Remove Password Security
In order to remove the security from a PDF file, it is necessary to possess the permission password. If your document is encrypted with a permission password and you happen to forget it, it becomes impossible to remove the security using any PDF editing tools.
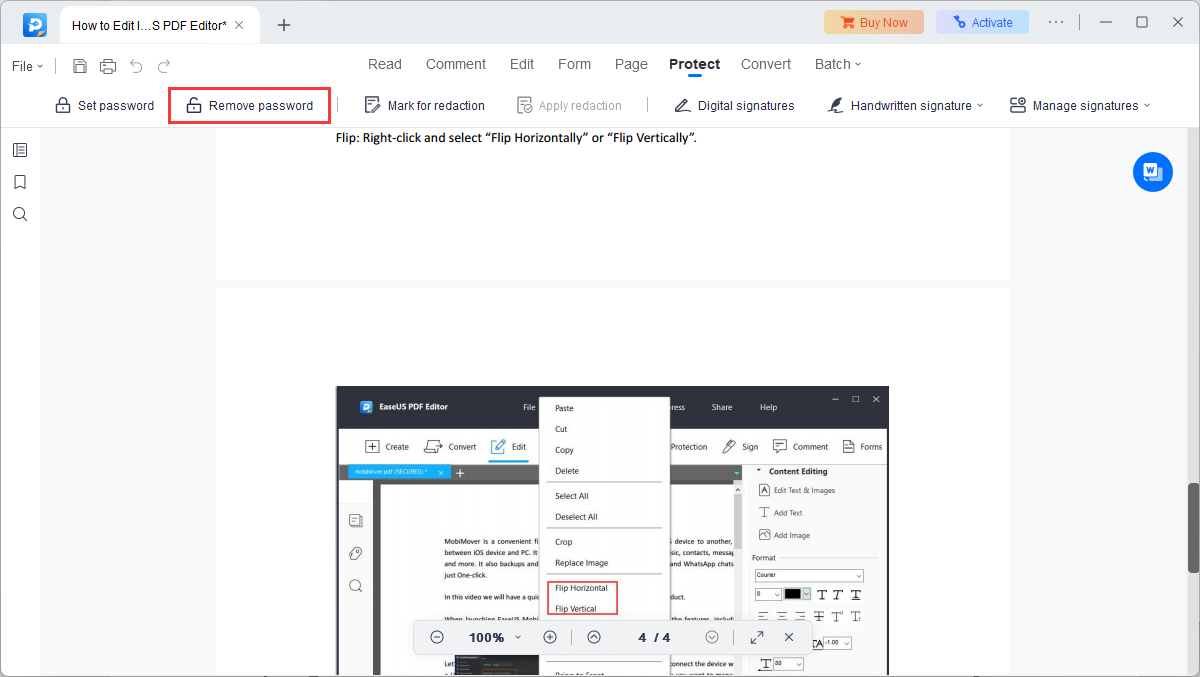
Once you open the PDF, you can forward it to Protect> Remove Password, and type the permission password to remove password security.
By following this method, you will be able to eliminate both the Open password and the Permissions password. However, if you only wish to disable the Permissions password, you may enter the Set Password section and uncheck Permission Password.
Note: Changes will be not applied to the document until you save the file again.
Sign a Document
EaseUS PDF Editor makes it simple to sign documents electronically. This is different from traditional handwritten signatures because digital signatures typically include extra information, such as the location, date, and time of the signature, as well as the reason for signing.
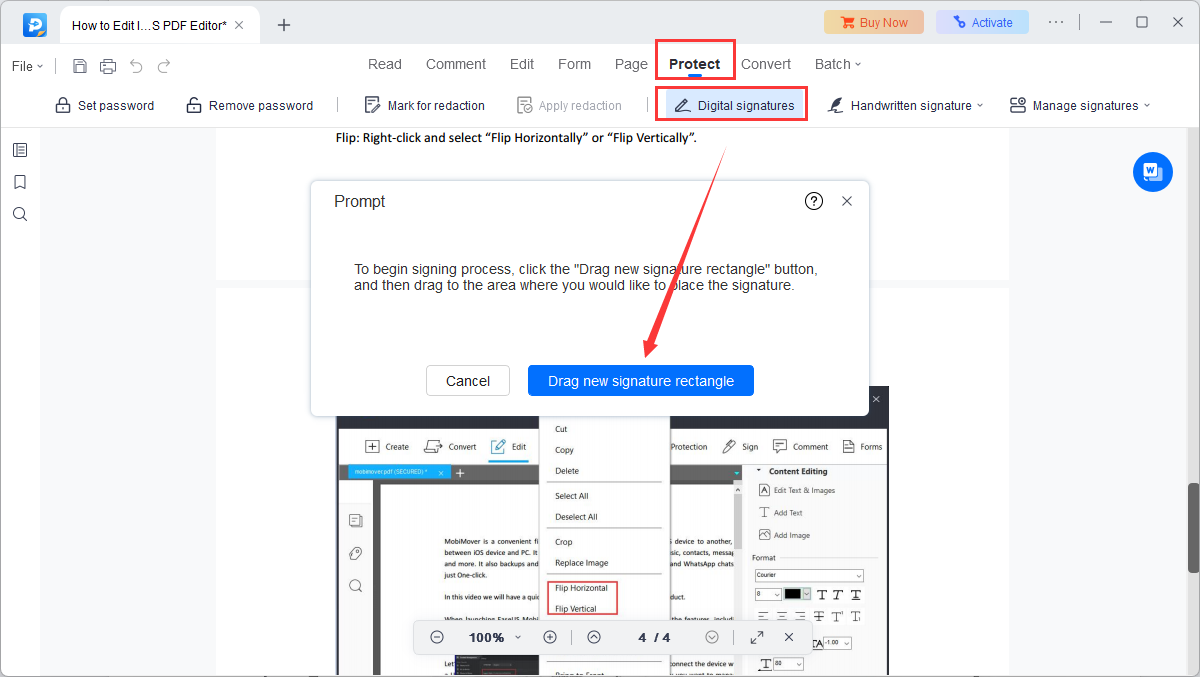
To sign a PDF, please select Protect>Digital signatures from the top toolbar. After that, click on Drag New Signature Rectangle, use your mouse to draw a rectangle on the page, then release the mouse.
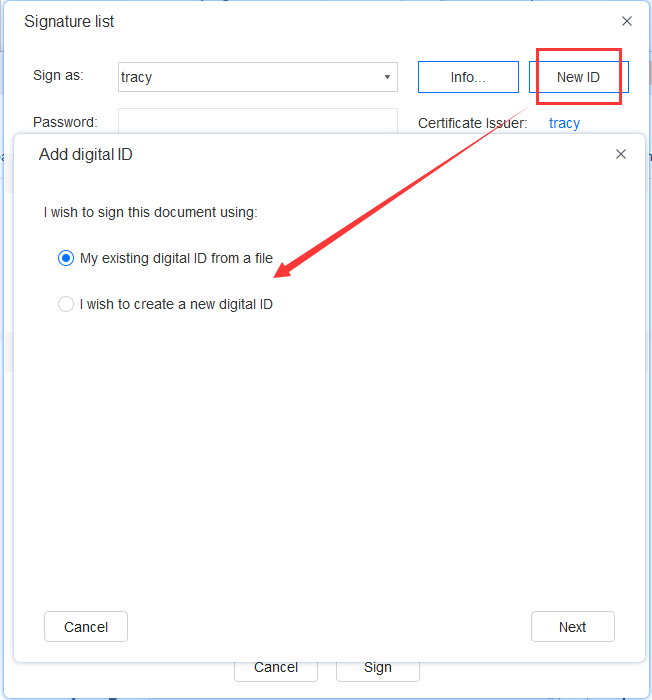
If you don't have a digital ID for signing, it is necessary to create a new ID. To create a self-signed digital ID, choose New ID from the drop-down menu of Sign As, then select I wish to create a new digital ID. Hit Next to continue and select where to store your self-signed digital ID. Once it's done, you can enter your identity information to generate a self-signed certificate.
After filling in the required information, you will be directed back to the Sign List window. From here, you can select a reason for signing and customize the signature's appearance. Lastly, hit Sign to confirm.
If you prefer to use a handwritten signature, simply click on it to select the desired signature. Additionally, the software provides an option to add a new signature if needed.
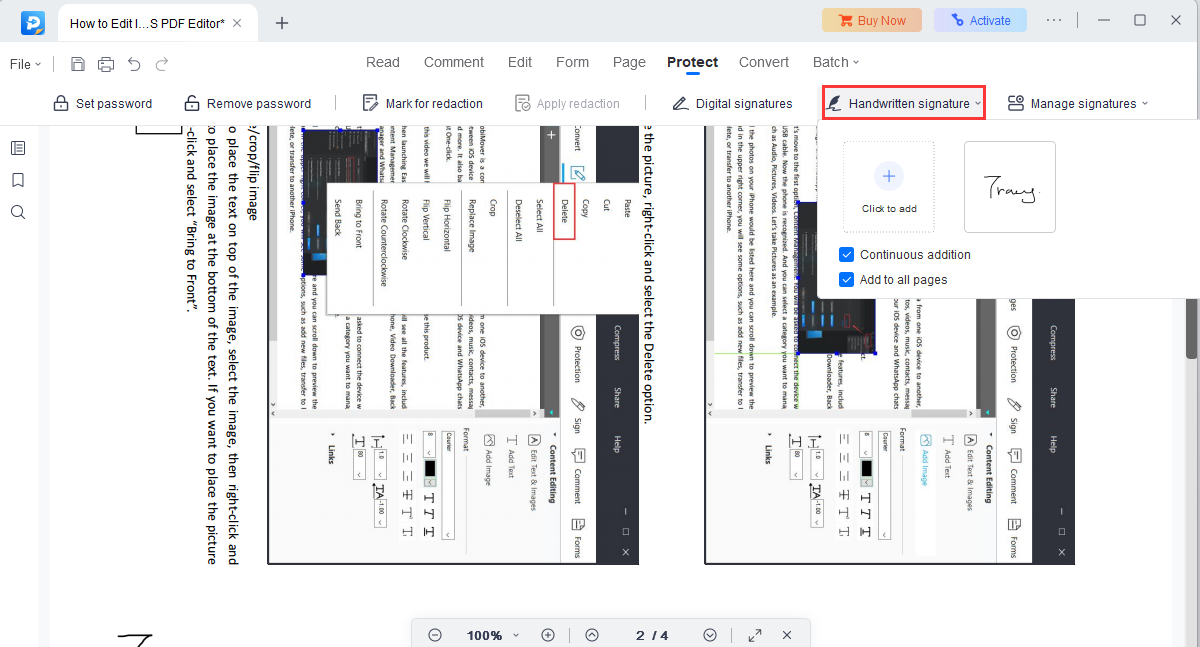
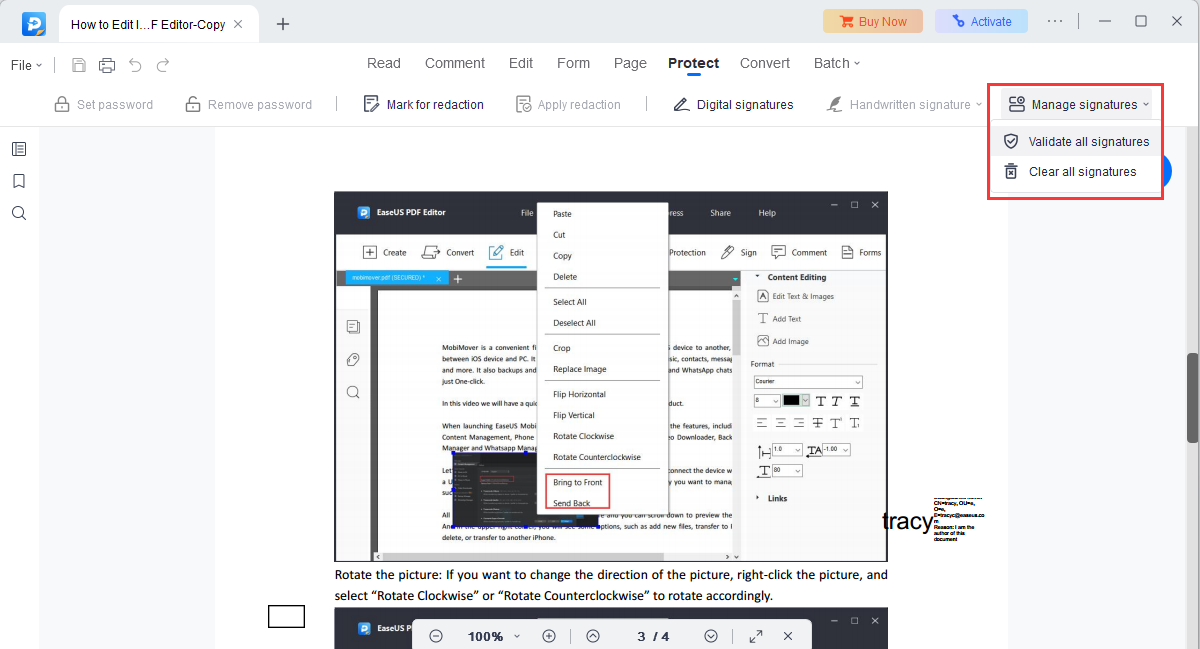
We also provide support for managing signatures, which includes the ability to validate all signatures and clear all signatures.
Comment PDF
For those who need to annotate PDF files, you can click "Comment". With this function, the two sections that are provided are annotations and drawing markups. In "Annotations", you can easily highlight, underline, strikethrough text, or even insert a sticky note for better illustration and review.
To annotate PDF files, simply click on Comment. You can effortlessly highlight, underline, strikethrough text, or even insert a sticky note for enhanced illustration and review purposes.
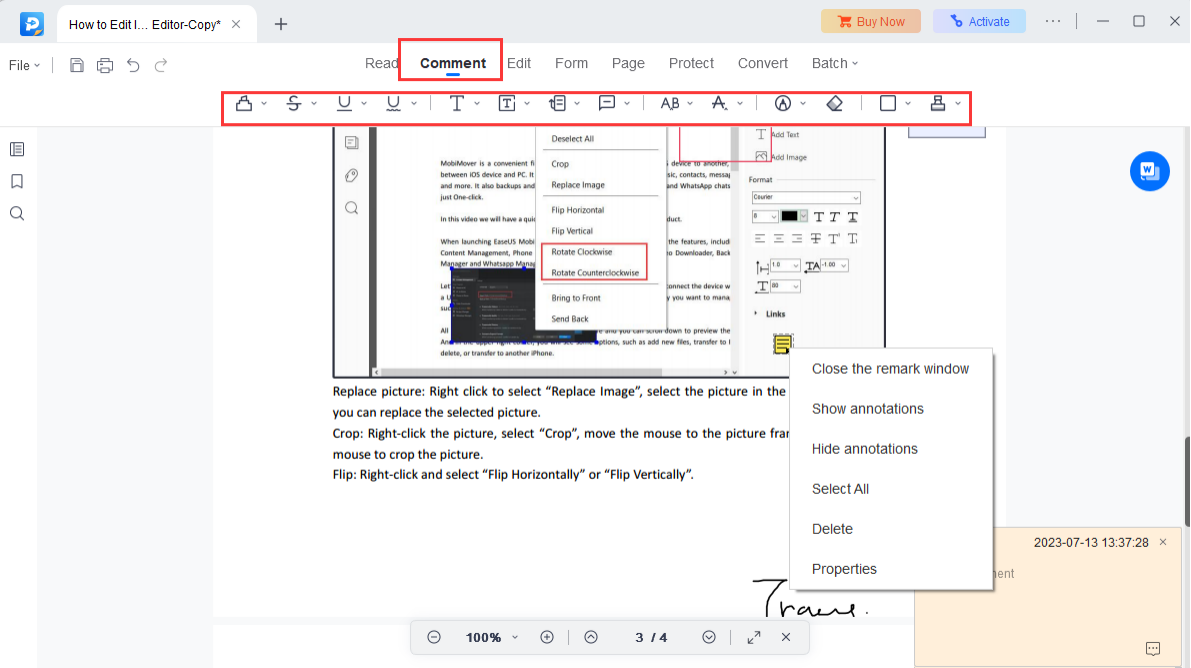
Upon drawing markups, you are allowed to add arrows, lines, ovals, and rectangles. If you place a markup at the wrong place, you can right click and delete that markup.
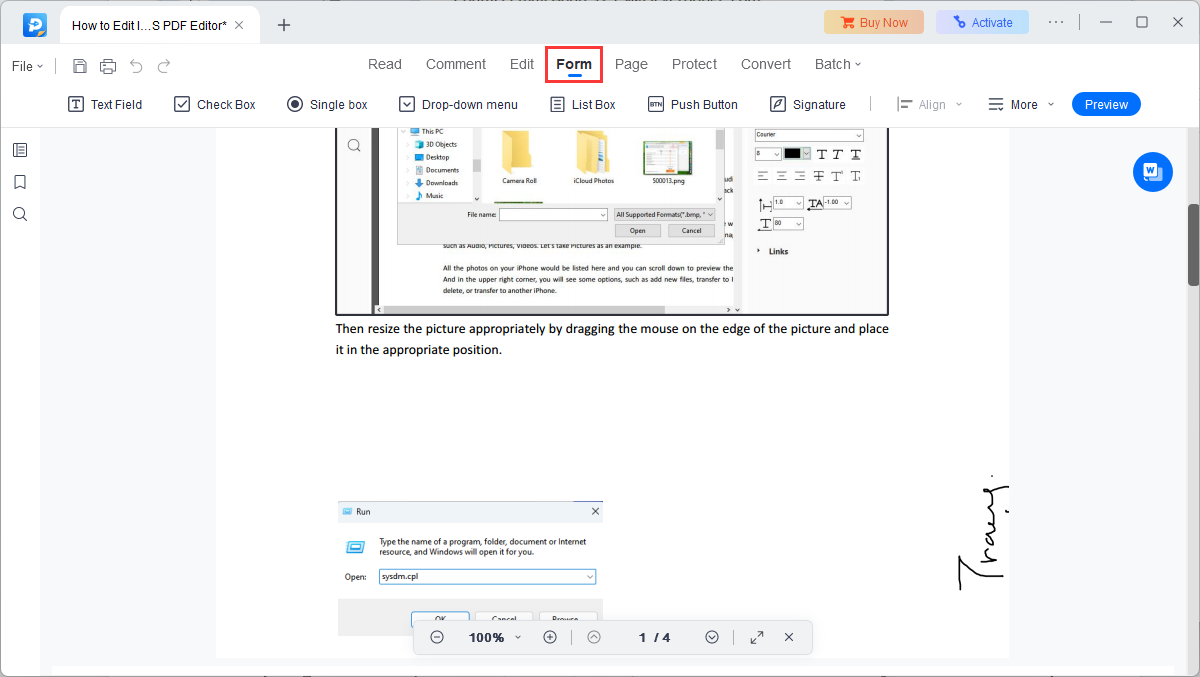
Forms
EaseUS PDF Editor has introduced a new feature for form creation. This feature allows you to create a customized form based on your specific requirements or import data from other forms into the form you are currently editing.
Feedback and Support
If you encounter any issues when using PDF Editor, you can directly go to Help or Technical Support for further assistance, or directly send an email to [email protected].
