- About
- Discover EaseUS
- Reviews & Awards
- License Agreement
- Privacy Policy
- Student Discount
How to Annotate/Markup a PDF on Windows and Mac
Melissa Lee updated on Jan 05, 2026 | Home > PDF Editor Tutorials | min read
PDFs are widely used in both commercial and personal environments. Sometimes, you might need to markup a PDF file on your computer. It might be that someone has asked you to add an image into your PDF, leave a comment in the PDF, and so on.
Luckily, both Windows and Mac have several ways to markup PDF files. You can use one of the many tools on these platforms to annotate your PDF files. Once you have done what you need to do, you can save the file, and your file will have your added annotations.
We have chosen some of the easiest ways to do the aforementioned task on your PDF files.
How to Add Annotation to a PDF on Windows
If you are a Windows user, you have plenty of options to markup or annotate PDF files on your computer. After having tested lots of PDF editing software, here we want to share with you EaseUS PDF Editor.
It is an all-in-one PDF editing program for Windows 10/8/8.1/7 users. With its help, you can easily open and view any PDF documents in different modes, like Zoom, Single Page view, scrolling view, etc. Besides, you are able to add comments, annotations, or add shape to PDF at the same time quickly, and there are many annotaion tools you can use to your PDFs, such as highlight, underline, shapes, callout, and more.
What's more, it also can be used as one of the best PDF converter software, which helps you create or convert PDFs to or from over 10 file formats in seconds without changing the layouts and formatting.
Now let's see how to add annotations to PDF with this Windows PDF editor:
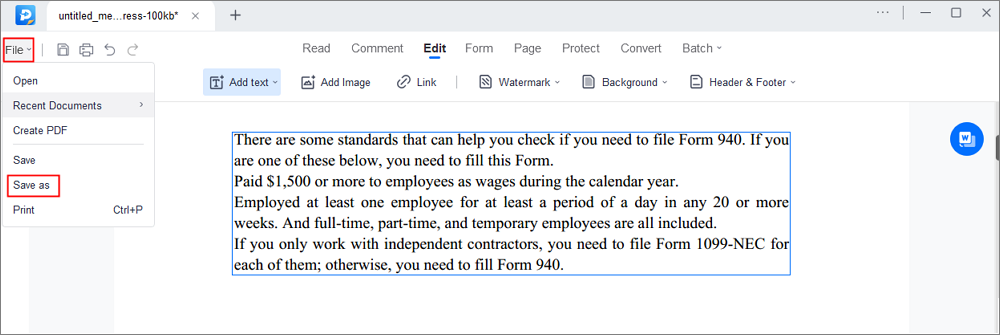
Step 1. Launch EaseUS PDF Editor and click on the "Open" button to import the PDF file you want to add comments/notes/bookmarks.

Step 2. In the next window, you will see the "Comment" and "Notes" button. You can also click the "Bookmark" and "Search" button on the left to add a bookmark or search content from the PDF.
If you want to highlight or remove highlight from your PDF, you can also choose the small brush icon on the left. To add lines/arrows, click on the pen icon.

Step 3. After editing, you can click "File" > "Save as" to save the edited PDF to your computer.
[Free Download] Top 7 PDF Annotator for Mac in 2026
Learn about the top 7 PDF annotator for Mac in 2026!

How to Annotate a PDF on Mac
Mac users have access to as many PDF editors as Windows, and so you can actually edit PDFs on your Mac pretty easily. There are both built-in as well as third-party methods to markup a PDF on Mac.
#1. Preview
The easiest way to play around with PDF files on a Mac is to use the Preview app. This app is actually the default PDF viewer on your Mac, and you can use the app to edit your PDF files as well. This means, without using a third-party app, you can make changes to your PDF files on your macOS-based computer.
Most Preview versions offer pretty much the same set of features, and so you can markup your PDF regardless of what version of macOS or Preview you are currently running. However, it is good if you are running the latest version of these items.
Step 1. Open Your PDF
Locate the PDF file you want to edit in a Finder window. Right-click on the PDF and select "Open With" and then "Preview". This opens your PDF file in the Preview app on your Mac.
Step 2. Access the Annotations Feature
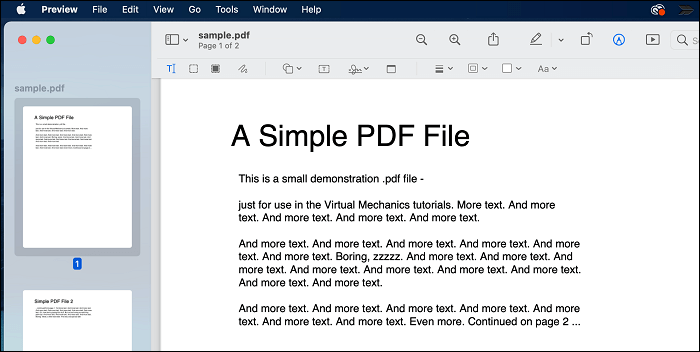
Once the PDF opens, you will see various options in the top toolbar. In this toolbar, find and click the option that says "Show Markup Toolbar". This will open the annotations options for you.
Step 3. Apply an Annotation to the PDF
You will now see all of the available annotation options on your screen. Click the one that you want to use with your PDF file. For instance, click the "Shapes" option to add a shape to your PDF file. Then, drag the shape where you want it to appear on your file.
Step 4. Save Your PDF
Lastly, when you have annotated your PDF file, click the "File" menu at the top and choose "Save". This will save any changes you have made to your file.
#2. Skim
If Preview does not work for you for some reason, you can use a third-party app called Skim to markup PDFs on your Mac. This is a free and open-source app that helps you to add notes to your PDFs, annotate them, and perform various other tasks on your PDF files. Using this app is easy as using Preview, and you should not have any difficulties on this front.
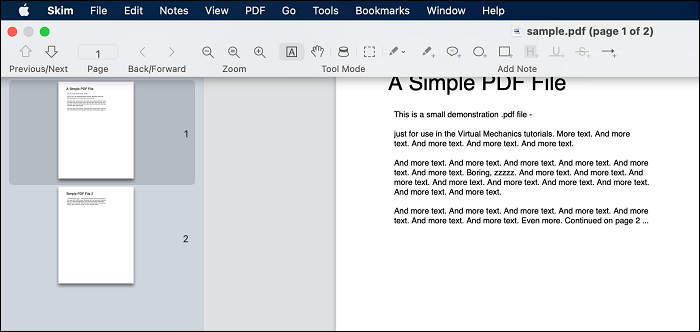
The app offers various tools to let you edit your PDF files. You can add various shapes, lines, and highlights to your PDF files. All of these options are present on the app's main toolbar, which makes it easier for the users to annotate their PDF files.
How to use Skim to annotate PDFs on Mac:
As said earlier, using this app does not have much technical experience. If you know how to work with Preview, you already know how to use this app. The steps below will show you how to make changes to your PDF with Skim.
Step 1. Open Your PDF with Skim
Download and install the Skim app on your Mac. Then, find your PDF file using the Finder. When your file is found, right-click on it and choose "Open With" followed by "Skim". This opens your file in this app.
Step 2. Add Annotations to Your PDF
Once your file opens in the app, you will see various options in the toolbar at the top. Find the option that you would like to use in your PDF and click it. Then, make the required changes to your PDF file.
Step 3. Save the Annotated PDF File
Once you have made the required changes to your file, you need to save your file. To do this, click Skim's "File" menu at the top and then select "Save". This will save the marked-up version of your PDF file.
How to Add Comments in PDF Online
If you are looking to add a comment to your PDF, there are various online ways to do this. You do not even need to install an app to append a comment to your PDF file.
The following are two of the web-based apps you can use to do this task on your computer.
#1. Google Drive
Most users think of Google Drive as just a tool to store files on the cloud, however, it is more than that. Using Google Drive, you can actually view your PDF files as well as comments to them. You do not need to install any extensions, and this feature works right off of any web browser.
You can upload your PDF file to Google Drive and add whatever comments you want. These comments are saved, and you can view them later. To use this method, all you need is a free Google account, and that will help you markup PDFs on the web.
Step 1. Upload Your PDF File
Open your favorite web browser like Chrome or Firefox and visit the Google Drive website. Log in to your account and then click "New" followed by "File upload" to add your PDF file. Choose the PDF from your computer, and it will be uploaded to this site.
Step 2. Access Your PDF File
Once your PDF is uploaded, you need to find it in your storage. Then, double-click your PDF so that it opens in Google Drive's built-in PDF viewer. Make sure you do not open it with Google Docs, or your file will convert to the Docs format.
Step 3. Add a Comment to Your PDF
When the PDF opens, select the text that you want to add a comment to using your mouse. You will now see an icon on the right. Click this icon, and it will let you add a comment to your PDF file.
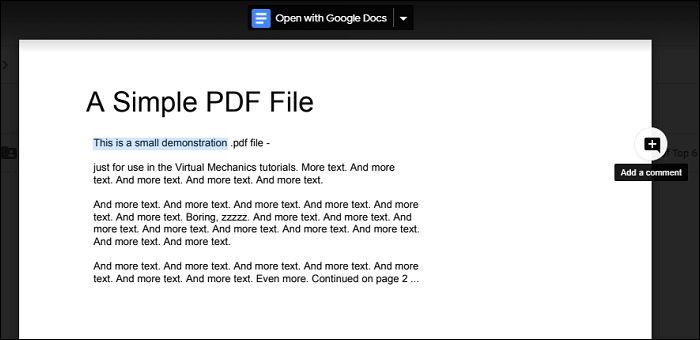
After adding a comment, you can edit the comment, delete the comment, and even get a direct link to that comment. You can access these options by clicking the three dot menu next to your comment.
#2. PDF Bob
PDF Bob is a web-based application that helps you edit and annotate your PDF files. Like other online apps, this app works from your web browser and requires no installation of any tools or apps. Simply launch your browser, access the app's site, and you can start using it. It supports all types of PDF files, including the ones containing media content.
You can use the app's various tools to mark up your PDF files. These tools let you add shapes, text, and various other items to your PDF files. Also, you do this on a pretty neat interface of PDF Bob.
Step 1. Access the PDF Editor
Open your primary web browser and access the PDF Bob website. Once you are there, find the button that says "Start editing PDF" and click on it. This opens the website's PDF editor for you.
Step 2. Upload the PDF File
When the PDF editor opens, you need to upload your PDF file to the site. To do this, drag your PDF from your computer and drop it onto this app's interface. This will upload your PDF to the site.
Step 3. Add Items to the PDF
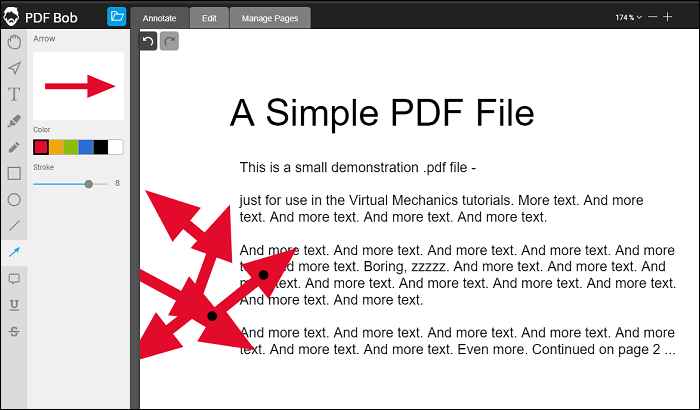
On the following screen, click the items that you would like to add to your PDF on the left sidebar. There are several items to choose from here, and you can add any item to your file. Try out various items before you finally decide on something.
Step 4. Download the PDF
Lastly, when you have annotated your PDF, click the "Export" button in the top-right corner of your screen and select "PDF". Then, hit "Export" to save the file to your computer.
The Bottom Line
Annotating a PDF on Windows or Mac is actually easier than you think. Using the methods outlined above, you can easily and quickly markup your PDF files on your computer. There are even apps that work online to let you edit your PDFs if you are not willing to install apps on your machine. Just Pick out one for your work now.
About the Author
Melissa Lee is a sophisticated editor for EaseUS in tech blog writing. She is proficient in writing articles related to screen recording, voice changing, and PDF file editing. She also wrote blogs about data recovery, disk partitioning, and data backup, etc.
